
One of the great things about having the tools and skills to complete carpentry jobs is that you can make almost anything you want with ease. With some simple equipment and a dedication to detail, it is easy to learn how to build a wooden chess board.
While building a box might seem daunting at first, it doesn’t have to be difficult. Most people would assume that creating a DIY chess board out of 64 square blocks could be time-consuming, but when it’s all said and done, you’ll be quite proud of your handiwork.
Don’t be afraid to build a wooden chess board; just grab your table saw and prepare to put your woodworking skills into action.

Top-Notch Materials for a Quality Project
The key to completing any quality woodworking project is to start with top-notch materials. Pick two contrasting kinds of wood such as maple and walnut. Make sure it is dry and straight.
The chessboard will be made up of 64 equal-sized square blocks. If these corners aren’t properly aligned, you are going to notice the gaps due in part to the contrasting color choices. We highly advise against cutting and gluing 64 separate blocks. Instead, use eight strips of wood which will make up the squares.
If you have an old wooden table lying around that you were planning to get rid of, you might be able to do this project even easier! Check out this idea to create a custom chess board from an old wooden table.
Creating the Checkerboard Design
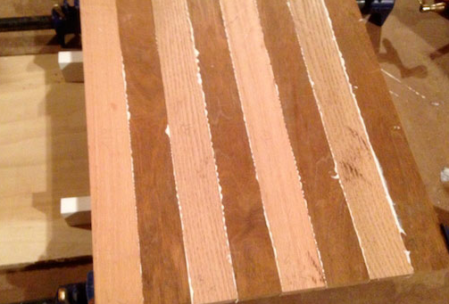
Start by cutting four strips of both wood choices. You’ll want them to measure two-inches wide, then edge-glue them to each other while ensuring they are perfectly aligned.
Once your glue has dried, crosscut the assembled panel with your table saw to true up one end. This will leave you with eight 2-inch wide strips of wood again. Rotate them properly and glue them back together but this time alternating the colors to create your chessboard design.
Wait for the glue to dry and sand the surface to remove irregularities. You’ll notice that the grain will run in varying directions because of how you constructed it, so don’t be afraid to get out the drum sander.
Your next step to build a wooden chess board is to groove the edges for the splines. Make some passes with the table saw while the blade is set to ¼-inch. Next, plane a light chamfer on the top surface and sand it to the final grit.
Detailing the Box with Coving
If you’ve built the lid as if it were part of the sides, now you can cut it free with the table saw. To reinforce your miter joints, most people will use a spline to add additional strength.
Coving the sides of your box is best done before you finish the build. Simply pass the wood on your table saw at an angle taking light cuts. For a cove, you want to bevel your blade at 45-degrees.
As a tip to make your DIY chessboard easier, clamp your straight-edged board as a fence on the saw before making several passes.
Put it all Together
Once you’ve completed coving, cut your side pieces and miter them. Cut 1/8-inch thick x 1/8-inch kerfs to use as splines on the mitered ends. Your next step is to cut the ¼-inch x ¼-inch groove located inside the box sides. You’ll do this with plywood but make sure you don’t glue them as they must have some float to them.
Sand the inside of the box while using masking tape to catch any escaping glue. Dry assemble your box and make sure everything is going to fit properly. Once you are sure it is ready, glue each piece carefully on a flat surface.
Once everything is square and lined up properly, allow the box to sit overnight. The next day, you can remove the tape and excess glue. Then, cut around the box to remove your lid.
Add Sophistication with a Base
This isn’t a necessary step, but to create a more sophisticated look, you’ll want to build a wooden chess board with a base. Do this with two pieces of ¾-inch walnut measuring 1 5/8-inch wide and ¼-inch longer than your sides. Miter your ends and stick them together back to back with some double-sided tape.
On your center line, you’ll want to drill a ¾-inch diameter hole located 2-inches from either end. Next, cut directly through the center with this length. Cut any waste away and clean up with your block plane plus rasp. Miter the four sides together and glue them to make a base.
After that is complete, simply glue it to the bottom of your DIY chess board.
Finishing Touches to Your DIY Chess Board
Mortise your hinges to the box and the lid. Then, sand the outside and finish off the piece however you choose. Some people think it adds a nice appeal by putting some felt inside and including separators. This is entirely up to you and will not affect the quality of your board.
Conclusion
Building a wooden chess board is a great project to tackle to show off your skill and expertise. Once it is completed, the entire family will enjoy sitting around to play games. It might even encourage younger members of the family to get involved with woodworking as well. A great place to start would be with our 3 Easy Woodworking Projects for Kids. Together, you and your family can enjoy the great craft of woodworking.

Having the perfect spot to do your woodworking projects is essential to every good carpenter. It allows you the space as well as the function to complete the task at hand. It also allows you to set up shop with the most basic of materials. You can build a woodworking workbench that provides you all the purpose you need for your building projects in a minimal amount of time following this woodworking workbench plan. Only simple materials are needed for this project that you will find will provide you plenty of use in your workshop. Here is an article about A Short History of Workbenches to give you some inspiration.
Using our DIY plan to create your very own custom workbench is easy with these step-by-step instructions that help to walk you through the construction process. These steps include:
- Step 1: Gather All Your Tools, Materials And Supplies
- Step 2: Measure Your Space To Determine Your Working Dimensions
- Step 3: Build A Strong Frame To Hold Your Tabletop
- Step 4 Cut And Construct The Legs For Added Support
- Step 5: Build Your Tabletop Surface From A Variety Of Materials
- Step 6: Finish Your Workbench By Adding The Tabletop To The Frame Base
Be sure to take your time with the building process and follow the plan as detailed below. You’ll have a custom worktable that you’ll be proud to call your own and place inside your workshop. So, don’t delay! Get started now. Your project is waiting for completion, and this woodworking workbench plan will help you along the way.
Step 1: Gather All Your Tools, Materials And Supplies
Before you begin crafting your workbench, you need start with the basics and procure the supplies and tools that you will need for the project. It is important to have everything you need at the ready so nothing interrupts the building process and you are able to complete your plan without any hiccups.
You should be able to find all the supplies you need for this plan at your local home improvement store. You may even have some of the supplies at your home ready for use. Gather all your supplies and tools together and have them ready as you begin the build process. You can find more information on essential woodworking tools by reading our Top 7 Essential Woodworking Tools for Beginner Carpenters article.
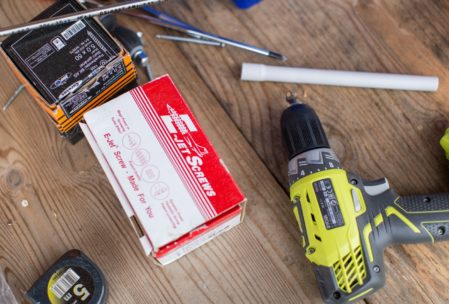
You will need to have the following tools and supplies:
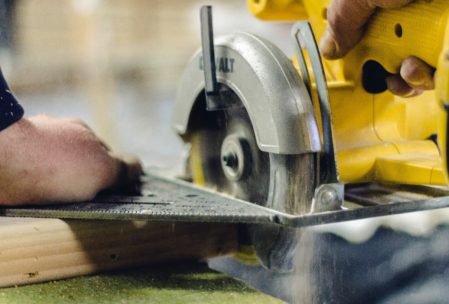
- Circular Saw
- Drill
- Belt Sander
- Screwdriver
- Tape measure
- Lumber
- Plywood
- Wood screws
- Angle brackets
- Wood glue
Step 2: Measure Your Space To Determine Your Working Dimensions
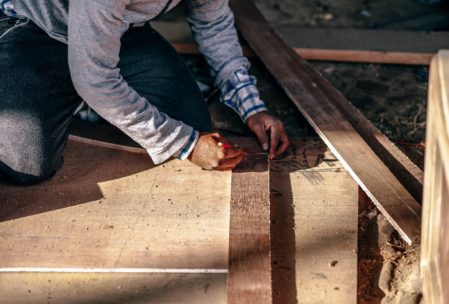
Now that you are ready to begin the building process, you need to consider the dimensions you want to employ. You may have a designated space within your garage or basement that you are planning to base your woodworking workbench plan on. It is a good idea to think about the space you have available to fit your DIY bench, and custom fit your plan to match.
Measure the area planned for your work surface and create a diagram of the layout. This can allow you to build a work surface that is completely custom to your workspace and provides you all the functionality you need in your workshop.
You should consider the size that you want the tabletop surface of your work table to be as well as the height dimensions. Think about how you will use your worktable and design your layout based on the functionality you will need. If you plan to stand while working at your work surface, you will need longer legs than if you will be doing a lot more sitting to work at the space. This is an important feature of your plan as too short or too tall a worktable will be uncomfortable and difficult for you to work and get the most use out of.
The tabletop of your worktable is particularly important as you want to make sure you have enough room to work while also fitting into your designated space. Give it some thought before you move on to the construction phase as it is best to have a solid idea of what you are creating with exact dimensions. We recommend a worktable size that has 8 ft. legs and a surface area of approximately 36 x 80 inches or the size of a standard door, but any measurements you decide on will work for your project.
Step 3: Build A Strong Frame To Hold Your Tabletop
When you have determined the size of the worktable, this woodworking plan will help you begin construction of the frame. Building the frame first will allow you to have a stable surface to place the tabletop surface on once it is cut.
To construct the frame, you will need to create two rectangles made from the lumber that you have purchased. You will want to make your frame approximately 2 inches smaller than your tabletop dimensions all the way around as you will want some overhang from the top surface. This will provide you the option to clamp things to the tabletop for convenience and without damage.
When you have cut the lumber pieces necessary to construct your frame to the correct measurements, use the threaded wood screws to attach the wood pieces together to form two rectangles. You will want to add support to the center of the rectangles with a stretch wood piece that runs the length of your bench. If you have chosen a smaller tabletop surface, you may be able to add a singular piece of wood support widthwise through the center. Without a middle support structure, your tabletop will bow in the center and create issues as you use it for all your building projects.
Step 4: Cut And Construct The Legs For Added Support
Now you will build the legs of your project by cutting your lumber into your predetermined leg height. You will need eight wood pieces all the same length for the legs. You will use two pieces for each leg to form an L shape and fasten them together using the threaded wood screws you have purchased. Repeat this process three more times until you have formed four L-shaped legs for all of the legs of your frame.
Attach the L-shaped legs to the rectangular frames you have constructed previously– one on the top of all four legs and one near but not all the way to the bottom of your legs. The lower frame will give your worktable the additional support you need. Plus, you’ll avoid any movement in your legs that could cause spreading. The legs should be attached to the corners of the frames and slide into the corners with ease. Use your wood screws to attach each of the legs the frames and secure them tightly.
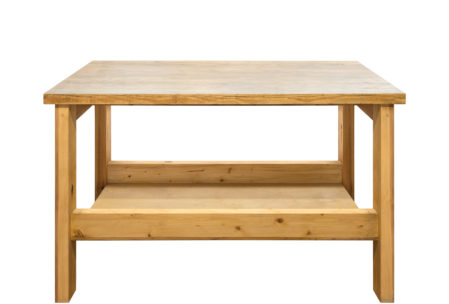
You will also need support pieces to extend the length of the work surface and provide additional strength as necessary. This will give you plenty of integrity when working on your worktop and the workbench plan you use will provide plenty of options for how these supports can be laid out. You may want to customize your project with cross members or use a traditional straight board design. Both offer plenty of support and can give you a custom appearance.
The lower rectangle frame of your woodworking workbench can also include a shelf. This is simple to do as all you will need to do is cover it with plywood. Simply cut a piece of plywood the dimensions of your lower frame and fasten it to the frame. This will serve as additional storage space for your workshop and provide a nice area to hold tools and equipment.
Step 5: Build Your Tabletop Surface From A Variety Of Materials

The woodworking bench plan that you use to build your DIY workbench offers an array of options for a tabletop surface. You may want a more personalized and may select a specialized wood piece for the top. It is also simple to use plywood as the top of your work surface as it provides plenty of durability and can be cut to fit the exact dimensions you need for your tabletop.
Another option for your tabletop design is to use a door. These can be found at reclaim shops or your local home improvement store. You may even have one that you are not using and can repurpose it here. You will not have to do any modification to your door if you decide to use this for your tabletop surface. Be sure to remove all hardware, and it is best if it is a straight door with no raised panels.
Select a wood piece that is long and wide enough to cover your entire frame base. You will want to account for your 2-inches of overhang and be sure to have plenty of room to fasten it to the frame base. You can easily cut your wood piece to the tabletop size you need, so it fits perfectly on the frame base you have built from your woodworking workbench plan.
You may want to consider drilling some holes in your tabletop surface as an option to hold tools, cords or objects that you use on a regular basis. It can also provide an easier way to clean a large top surface as the holes allow you to sweep sawdust and debris off your work table where it can easily be swept up and get out of your way of working.
Step 6: Finish Your Workbench By Adding The Tabletop To The Frame Base
You will now need to attach the top of your bench to the base. This can be done using the screws and angle brackets. When attaching your tabletop surface to your bench base, you need to ensure it is center and your 2 inches of overhang is properly distributed. Use angle brackets to attach the tabletop to the top frame and secure them with your wood screws. You will need four screws per bracket to ensure a secure attachment.
Once the tabletop is attached, you will want to ensure all the brackets and wood screw are secure on the base as well as the top. Just walk around your DIY workbench and tighten as you see fit.
You may also want to provide a light sanding of the top of your worktable for a more refined look. Another option is to put a coat of polyurethane on it for added durability. This will protect the top of your bench and allow for easier cleanup. You can also add a power strip underneath to power electrical tools that you will be using in your workshop. This will make it extremely handy for the operation of these tools, and a power strip can be added to the top support frame that you built.
Another consideration to keep in mind with your work surface is the event of damage. While this DIY woodworking workbench will provide you plenty of years of use, if it should become damaged in any way, you can simply remove the tabletop surface and flip it over to use the other side. For more severe damage, you can replace the top of your worktop with a new wood surface. Just follow your woodworking bench plan that outlines the installation of a new tabletop.
Now that the hard work of building your project is complete, you can begin using it as part of your woodshop and have many years of enjoyment with its construction. By using the woodworking workbench plan here, you will be able to build your very own custom DIY bench in minimal time and with minimal effort. This will give you a range of functionality in your workshop and allow you to a dedicated spot to perform all your woodworking projects.
Keep this woodworking workbench plan in mind as you can easily convert them for another tabletop project at your home. This simple DIY plan can make a nice work area for gardening supplies and planting tools as well as a simple craft area for your family to enjoy. The versatility of completing a work table can open the doors to many more woodworking projects for you in the future. Keep building!