3 Easy Woodworking Projects for Kids
Working on a woodworking project with your kids can be a fantastic way to spend time with them. Sharing your passion for this hobby is also a great way to jumpstart their skills and give them the opportunity to practice. There are so many options for furniture plans, toys and wood building projects for kids that require a broad range of skills and tools. Here are three easy and cool wood projects that will start them on their way.
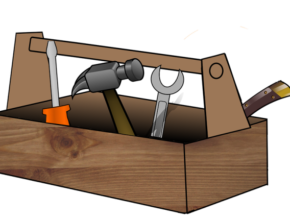
1 – Tool Box
What better first project is there than a toolbox.
Materials:
1×6, at least 24″
1×4, at least 24″
3/4″ doweling
1 1/4″ nails
3/4″ nails
wood glue
Cutting:
Ends
- Cut two 8″ lengths from 1×6
- Measure 3 1/2″ from one end of the cut 1×6 and mark a line across the board.
- On opposite side of board find the center, mark, and measure 2 inches down and mark with a pencil for the dowel handle hole.
- Using 3/4″ drill bit, drill hole for doweling.
- Next, mark one and a half inches on either side of the previously marked center line above the hole.
- Now make a diagonal cut from the line measured in step 2 up to the line marked in step 5. This completes the preparation of the end
- Repeat on the other end board.
- Sand end pieces lightly
Sides
- Cut two 10 1/2″ lengths of 1×4 for the sides.
- Sand lightly
Bottom
- Sand the plywood piece lightly
- Ensure that it is approximately 12″ x 5 1/2″
Assembly
- Make sure all of the pieces fit together.
- Using wood glue and the 1 1/4″ nails, attach one side piece to an end piece.
- Repeat with the other side piece.
- Glue dowel into the attached side piece.
- Attach remaining end to the side pieces with the same nails and wood glue.
- Attach the bottom piece with the smaller nails and wood glue.
Painting or varnishing the assembled toolbox is a great way to personalize it.
2 – Picture Frame
Making a frame and including it with a special photo can make a great gift. The following plan works great for a 5×7 photo. If you need a bigger one adjust the sizes accordingly.
Materials:
8.5″x11″ piece of construction paper
1″x2″ furring strips
wood glue
1 1/2″ nails
stapler
Mat:
- Measure and mark lines to cut construction paper into 8″ x 10″ piece. TIP only mark up one side of construction paper so there will be one clean side once mat is done.
- Set photo on construction paper piece and trace lightly with a pencil.
- Measure and mark another rectangle 1/2 an inch smaller than the photo. ( approximately 4 1/2″ x 6 1/2″)
- Now cut out an inner rectangle to leave a rectangular strip that is 8″ x 10″ on the outside and 4 1/2″ x 6 1/2″ on the inside.
Frame:
- Cut two 8 1/2″ pieces of 1×2.
- Cut two 9″ pieces of 1×2.
- Stain or paint as you please.
- Once dry, Place one 8 1/2″ piece under a 9″ piece as if you are making a box, and attach with nails and wood glue, nailing down through the 8 1/2″ piece into the other piece of wood.
- Attach the other 8 1/2″ piece.
- Attach the remaining 9″ piece.
Assembly:
- Place the photo on the mat and attach with tape, taking care to place it on the correct side.
- Staple the mat to the back of the frame so that the photo is visible from the front.
3 – Rubber Band Powered Boat
A great way of learning bigger concepts is to do hands-on projects. This boat can show the basics of how historical paddleboats function. It is a great example of a cool wood project and is also a fun toy to play with whether in a pool, lake or bathtub!
Materials:
1″x4″ wood, at least 8″
1/4″ wood pieces for the paddle
Rubber Bands
Wood Glue
Boat:
- Measure and cut 1″x4″ wood to 3 1/2″ x 8″
- Cut front hull point.
- Cut notch in the back of the boat for the paddle. Keep at least 3/4″ on either side for support.
- Now cut the 1/4″ wood pieces into identical sized rectangles slightly smaller than the notch on the boat.
- Cut a notch on both pieces about half way across the width, with the notch the same width as the wood itself.
- Slide the notched wood pieces together.
Assemble:
- Put a rubber band across the notch in the boat.
- Place paddle in the rubber band and wind it up!
Considerations Before You Start
Safety is always paramount when working with tools, but when there are children in the shop, you must be even more deliberate with your safety considerations. Proper eyewear and using the provided guards on power tools are two examples that are a must when building wood projects with and for kids.
When you pick a project, consider the required skills but from there have your kids choose the one that gets them excited! There are plenty of options for great toys, cool wood projects and even some easy furniture plans they can try their hand at.
Have fun creating!
COMMENTS