Top 3 DIY Woodworking Gifts Ideas
‘Tis better to give than to receive.‘
I have absolutely no idea where that saying comes from, but I do understand the sentiment. Getting gifts from others always makes me feel a little embarrass. But giving a gift is certainly a joyous feeling. Even more so, if the gift was made by my own hands in my wood shop. In today’s blog, I’ve got three gift ideas that won’t just put a smile on your face. I know the receiver of them will be a very happy person, too.
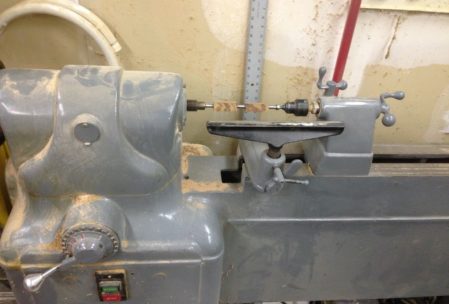
Actually, the first two plans are related, so although the column says this is three gifts, it’s really two. But one of them is a two-piece ensemble. We’re going to create a home-made pen, and the gift box it comes in. In my blog post back in February, I wrote that a well-equipped shop should have a lathe. I hope you heeded that advice, because this first project calls for some tricky turning.
1. Wooden Pen
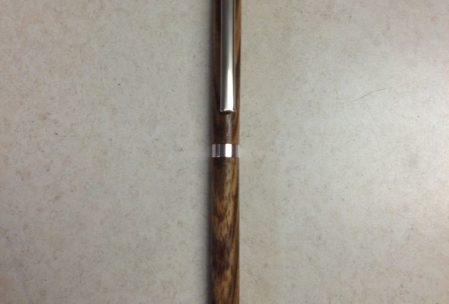
A pen seems like such a simple thing. And, yes, that plastic thing you buy at the local convenience store for 59 cents is so simple, that giving it as a gift would be shameful. But a pen turned on your lathe is a keepsake!
Tools:
Lathe with a 7mm mandrel and accompanying chisels
Drill and 7mm drill bit (I recommend using a drill press for this)
Saw
Supplies:

1×1 block of hardwood (Zebra Wood’s picture here) in the appropriate length for your pen kit
Super glue
Sand paper
Hut wax
First, cut the wood block to the appropriate lengths for the two brass casings included in the pen kit. These form the barrel that the pen parts will fit into. Next, find the center of the wood block on the end, and drill a 7mm hole all the way through the block.
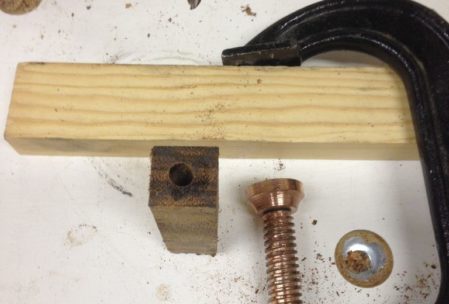
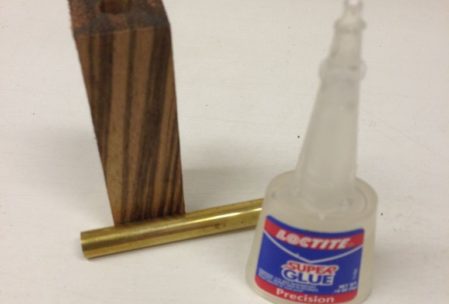
See why I recommend using a drill press for this step? Clamp your block firmly in the press and take your time drilling this hole. Once you drill the hole, apply some super glue to the exterior of the brass casings, and slide them into place inside your wood blocks.
Now, go kill some time mowing the lawn or something. That glue has to dry.
With the grass cut and the glue dry, it’s time to move on.
Place the wood blocks on the mandrel in your lathe, and set the speed to very slow. These are small blocks of wood; and can be easily destroyed by aggressive lathe work. Take your time turning this block down to a cylinder, at which time you can increase the speed a bit if you like.
There’s room for a little individuality here, if you like. Then pen in this example is straight, but if you wanted to make the pieces bulge a little in the middle for a thicker grip, go for it. Once you have the basic shape and thickness you want for the pen, switch from the chisel to some 80 grit sandpaper to finish the molding job.
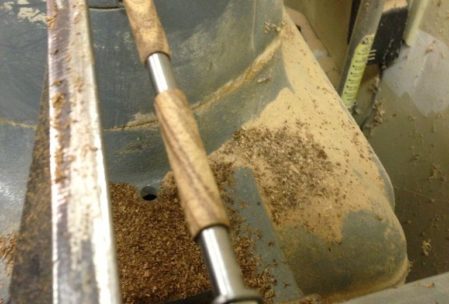
Wrap it up with some #220 paper and finish the pen with some Hut wax. Install the pen parts according to the directions included with them, and enjoy the one-of-a-kind pen you just created. But, if you’re going to give this pen as a gift, you need a box for it. So, let’s build that next.
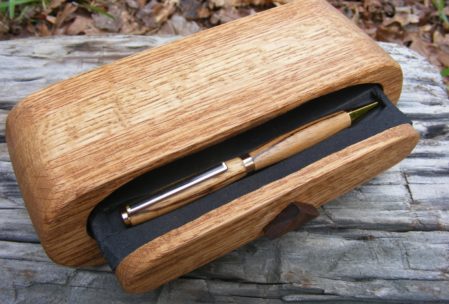
2. Band Saw Pen Box
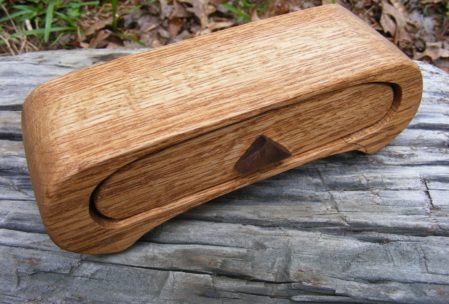
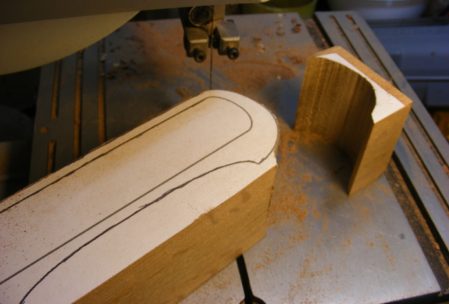
Yes, this pen box is made almost entirely with a single tool – the band saw. Okay, you’ll need a couple of clamps and a sanding drum for your drill, but that’s it for tools. You will need a block of wood 3×3 inches and a few inches longer than the pen you’ve already made. You can use wood that either matches or contrasts with the pen. Your choice.
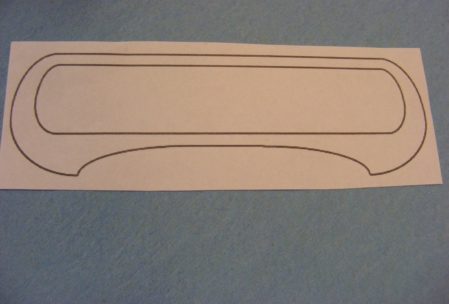
Sketch out the design of your choice on a piece of cardboard, and use a spray adhesive to bond it to the block of wood. Now, using that band saw, cut the outside edges of the pattern first.
Then slice off the back of the box, at least 3/8” thick.. This will be glued back in place once the center drawer has been formed.
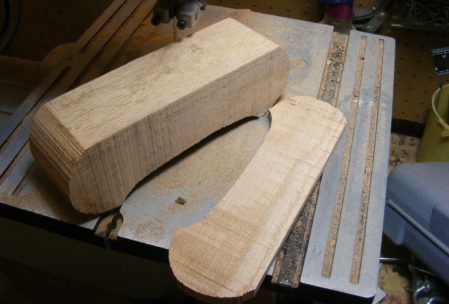
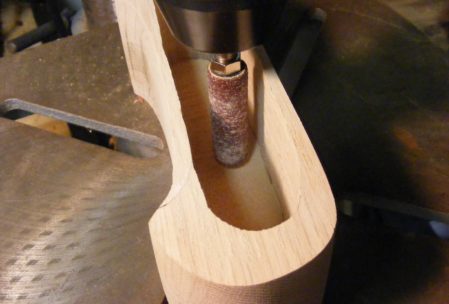
You’ll need to make a slice through the shell of the box to cut the drawer from the inside. Do this in a spot as inconspicuous as possible, like a lower corner. Once the drawer block has been cut out, glue and fill this cut.
Carefully cut out the center of your block, which will become the drawer. Cut away as little of the wood as possible to make the turns. (You might want to practice this on a piece of scrap wood first, to get the hang of it.)
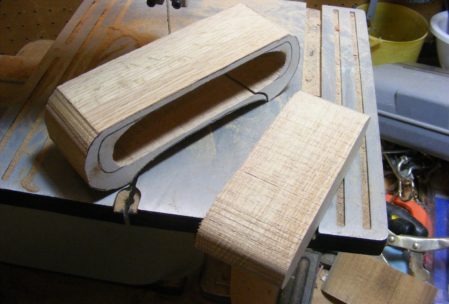
From the drawer piece, cut a slice off the front and back. They will become the face and backing of the drawer. Now, cut out the drawer, keeping in mind the dimensions of the foam pad you are going to glue into it. You want this to look as neat as possible, because it’s the part of this project that cradles your handmade pen.
Glue and clamp the face and back of the drawer back in place, and also glue the back of the main piece in place.
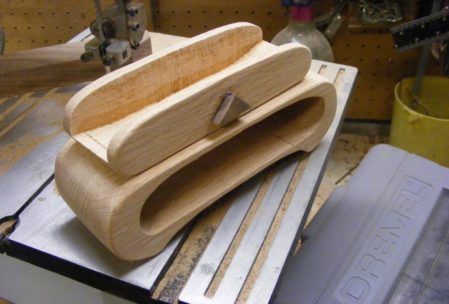
Now, sand, sand, sand until everything is finish-smooth. In this example, an opposing color piece of wood is used to create a small knob for the front of the drawer. Nice touch. If your box matches the wood you used for the pen, use the same wax to create the finish. Cut out the foam padding and glue it inside the drawer.
You are about to give the gift of a boxed pen that no one else in the world will ever have!
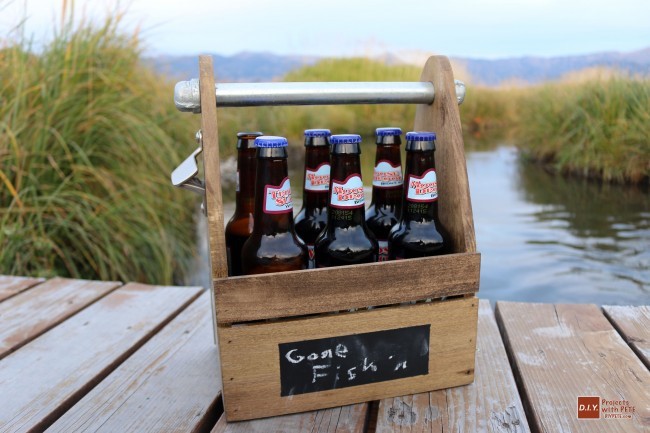
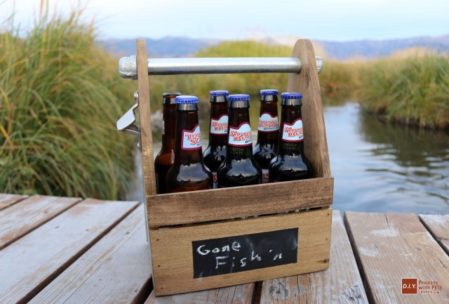
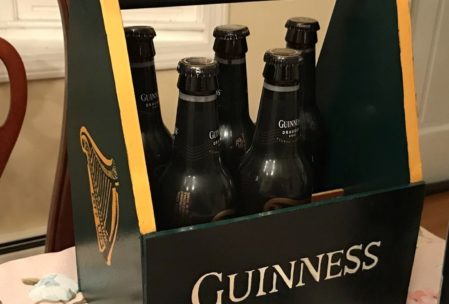
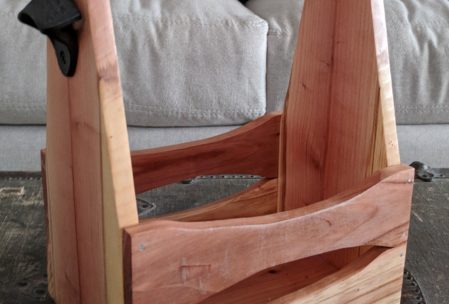
3. Beer Caddy
Now for something completely different. I have lots of lunkhead friends who wouldn’t know what to do with a pen. This beer caddy (stocked with 6 fresh cold ones, of course) is more their style. This one is simple, but is guaranteed to make the recipient happy (well, tipsy at least).
The example is so poplar, a good choice, but as the photos at the end of this article show, you can use any wood and go crazy with the finishing. Cut the half-inch thick sides and bottom to the dimensions in the drawing, and drill holes at the tops of the side pieces for the pipe handle to go through.

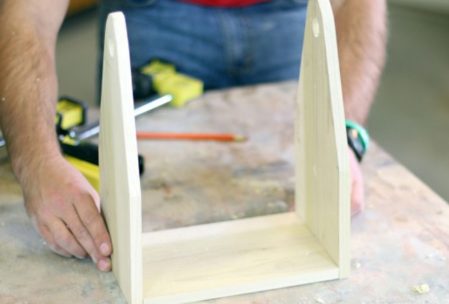
Glue and nail the pieces together, and apply the stain of your choice. Since the bottles you put in there had better be ice cold, you need to expect some condensation, so apply a waterproof clearcoat as well.
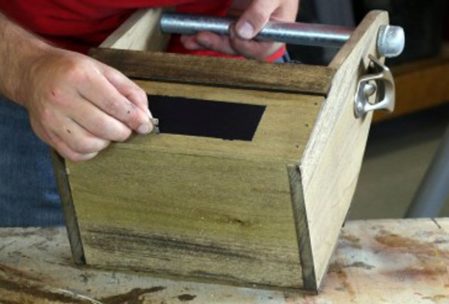
In our example, the wood worker also applied a small patch of chalkboard strip so he could label the contents “Beer” or some other equally clever term. Attach the pipe handle (you could use rope, alternatively) and a bottle opener to the outside, and you’re all set. It’s a great way to dress up a “gift” of a six-pack to your buddy, especially since we both know you intend to drink half of it yourself.
Leave a Reply