As woodworkers, we are always looking for new things to build. Tables, chairs, cabinets. All kinds of pieces to beautify our homes with the elegance of personally handcrafted fine wood furniture. But when we think about what our children would like for their birthday, for example, we run to the store and buy the latest “hot“ toy. It is usually some plastic gizmo that will lose its appeal within days, when the next new craze hits the shelves.
How about heading for your woodworking shop instead? I’ve got two easy DIY wood toy plans that your children will love.
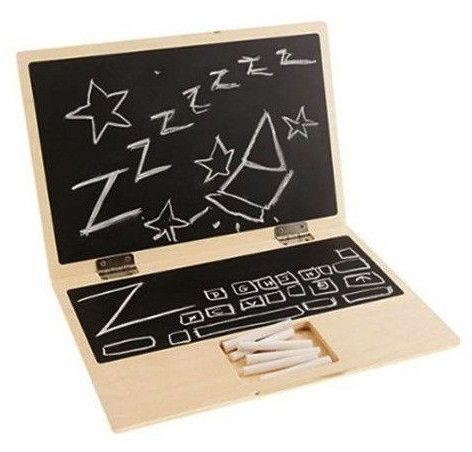
Chalkboard Laptop
As a parent, I know that my kids watch everything I do. That can be a scary thought. But let’s take fear out of that by building something they can have fun with, even as they mimic us. Now, when you open your laptop to log onto Joinery Plans website, your son or daughter can open their chalkboard laptop and draw while you surf.
Materials
- (2) pieces of wood 12”x9” (I used 7/16” finished plywood, but use the wood of your choosing. A hardwood version would be beautiful!)
- (2) 1 ½” hinges and screws to mount them
- Chalk vinyl
- Small strong magnet
- ½” steel disc
- Paint or stain
Tools
- Router and bits
- Drill and bits
- Saw
- Sandpaper
The Build
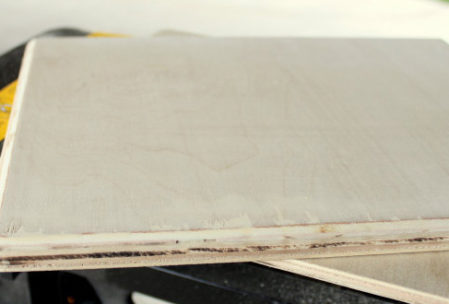
How you cut the wood is going to depend upon what you are using. For our plywood version, we used a table saw to cut the two 12”x9” pieces. With your router, slightly round all of the edges. This is a toy, so we want to make sure there are no sharp corners.
Next, create the chalk tray. Using the router, plunge cut an area about 4 inches long, 2 1/2 inches wide and a half-inch deep on one piece of wood in the same area that your laptop has its touchpad.
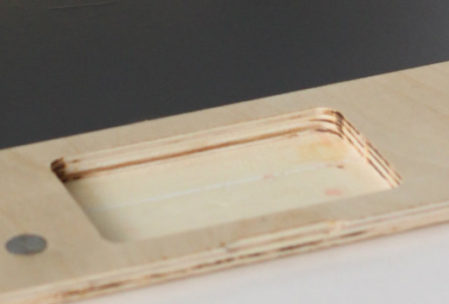
Lay your two pieces of wood next to each other and mark the hinge outlines. Fire up the router and carve insets for the hinges that will be deep enough to create a slight binding of the boards when the laptop is opened. This will keep the “screen” upright instead of flopping all the way back.
You should be able to find powerful 1/2” magnet discs at the hardware or hobby store. Countersink one of these in each of the front corners of the base, and a piece of steel (sheet metal or a nail head) in the matching location on the screen piece. Secure them in place with wood glue.

Check the mounting instructions for your chalkboard vinyl. You may have to paint or stain before you apply it, or you might have to apply it first.
The Ultimate Sandbox
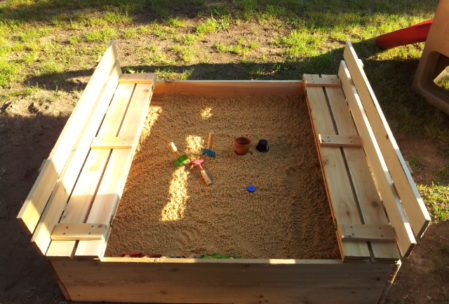
Keep the cats, leaves and other debris out of the sandbox, and make it a whole lot more fun to play in with this fantastic design that even has built-in benches! This sandbox is made of cedar to be weather-resistant, but also safe for the kids. The chemicals used for pressure-treated lumber are not child-friendly.
Materials
Cedar Lumber Needed:
- (4) 1”x6”x8’
- (6) 1”x4”x8’
- (2) 1”x3x8’
- (1) 4”x4”x4’ post
- (12) 1 ½” brass hinges
- 1 Box 1 ¼” exterior wood screws
- Sandpaper
Tools
- Miter or Circular saw
- Drill and bits
- Tape Measure
- Square
The Pieces
Cut the 1×6 boards exactly in half, so that you have eight equal length pieces. These will form the box. Cut the 1×4’s the same way. They will be the top. From the 1×3’s, make six 7½” pieces that will become the seat braces, and four 17” pieces that will become the back braces. Now cut four 11” long pieces of 4×4. These are the corner braces in the box.
The Build
At every step of the process, use your square to make sure you have the corners true, and predrill all of the screw holes. Cedar is unforgiving and will split if you don’t drill pilot holes. Our sides are going to be two boards high. Build a side by screwing a 4×4 to each end of the first board. Add the second board, being careful to keep the two boards as tight together as possible, or sand will leak out. Build a second side in the same way. These 2 sides will form the “long” sides of the box, because when you mate the remaining boards to them, they overlap the ends of the first two walls. So, the short sides will be 1 ½” shorter than the long ones.
Set your box in its final site. Make sure it is absolutely square. It’s a good idea to lay down some landscaping material or other weed barrier to keep things from growing up through your sandbox. You can actually staple this to the inside of the box several inches above the ground to keep sand from squeezing out from under your box, too.
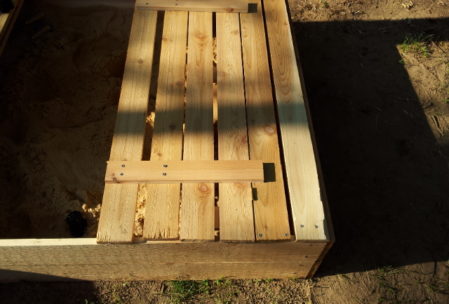
Let’s build the top. Lay out six of the 1×4’s, leaving about a half inch gap between them and squaring them up with the box sides. Screw the outermost two pieces to the box (drilling pilot holes first, of course). Using three of the 7 1//2” braces, let’s build the seat. These braces will go on the underside of the 2 center pieces of our top. When it is flipped open, this will form the bench seat. Screw the two pieces together, placing one of the braces about 3” from either end and the third brace right in the center.
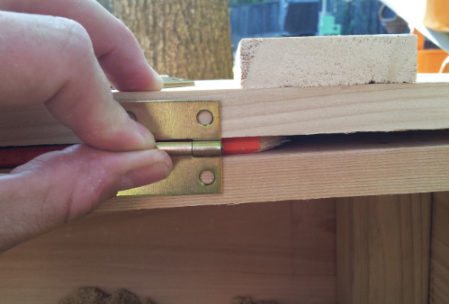
Lay the finished seat on top of the first two boards, using your carpenter’s pencil as a spacer to maintain the ½” space between boards. Place three hinges along this edge, one in the middle and the other two about 6” from either end.
The seatback is next. Lay only the bottom board for the seatback (this would be the fifth board in from the end) on top of the opened seat, and install your hinges. Remember, these hinges swing in the opposite direction from the first set, so mount them accordingly.
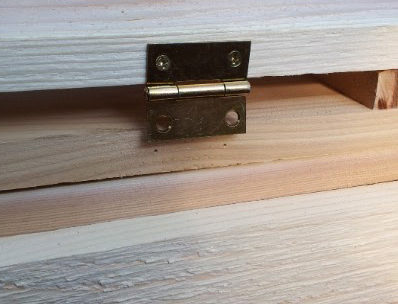
The final board is attached to the seat back using the remaining 17” pieces. Screw boards number 5 & 6 to this board, making sure that both of these slats are very square. When you fold the seat open, these slats act as the braces for the seatback. I also suggest mounting a small piece of your wood scraps on the outside of the box for them to rest on.
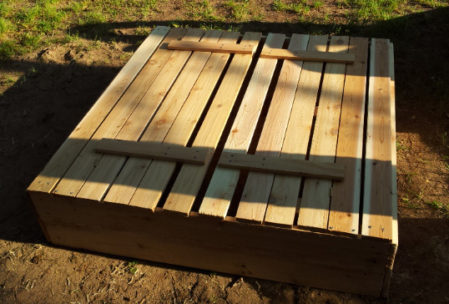
Now, build the other top exactly the same way. Then sand everything, paint or stain it, or even leave it au natural. Finally, fill it with sand and let the fun begin!
So, you have always been interested in woodworking, but never did more than just dabbling around the edges. And now you’re ready to go for it! But where to begin? Well, for starters, you’re going to need a sturdy workbench. It literally forms the foundation upon which you will build all of your other projects. So, let’s begin our 2 Easy Woodworking Project Plans for Beginners by building our work bench, and then we’ll move on to the second of our easy wood projects that will help launch your woodworking hobby in a big way.
A Sturdy Workbench Built on the Cheap
Your bench may be the only thing you build that never leaves the shop. But the quality of everything you make can be affected by it. You use the bench to saw, hammer, screw, clamp, glue and finish everything. It is indispensable, and needs to be sturdy. Search the internet for workbench plans, and you’ll find thousands. But, in my humble opinion, most of them are lacking in one major area.
Bench plans frequently call for the work surface to be made of ½” plywood. That’s just not heavy-duty enough to provide a stable surface. Try pounding a nail through a couple of 2×4’s, and everything else on that bench will bounce around, and eventually fall on the floor. This bench plan solves the problem by using a solid-core wooden door as a sturdy work surface. Brilliant!
Tools
Miter saw (I have a 10-inch sliding miter saw – a necessity in any shop)
Drill
Screwdriver or screw gun
Hammer
Tape Measure
Carpenter’s square
Pencil
Supplies
(10) 2”x4”x8’
3” wood screws
1 ¼” inch wood screws
(6) 90° steel angle brackets
1½ inch 6D finish nails
(1 ) 36”x80” solid core wooden door. Search for this at resell stores where damaged materials are sold. For example, a Habitat for Humanity Restore. Some hardware retailers also sell damaged goods. If there are a couple of scratches in the finish, no one will want to use it as a door. But it’s perfect for a bench top.
Build the frame
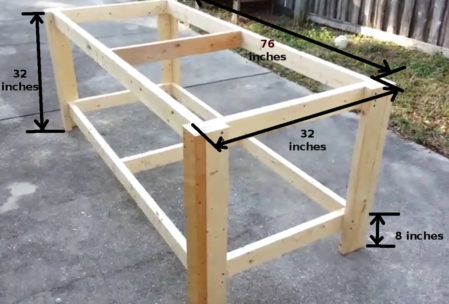
The entire frame is made of 2×4’s. Begin by sawing eight 32” long pieces that will form the upright legs. If you want a taller bench, increase this length, but be sure to increase your lumber purchase accordingly.
You want the benchtop to overhang the frame by a couple of inches, so you can use that edge for clamping. So, if the door is 36×80, make the frame 76×32. That means we need four pieces 76” long, and four pieces that are 29” (the end pieces will fit inside the dimensions of the longer ones). We also want to add a bit of strength in the center of our frame, so cut two more 29” pieces that will become joists.
To build a leg, clamp two of the 32” pieces together in an “L” shape. Predrill holes for 4 screws placed at even intervals, and secure the pieces together with 3” wood screws. Repeat this procedure for the other 3 legs.
The frame that our door will rest on gets built on the inside of the “L” of our legs. The 76” piece gets mounted first against the short side of the “L”. Use two 2” screws for this task, predrilling all holes to avoid splitting the wood. The 29” piece then gets butted up against the longer piece, and screwed into the long side of the “L”. Be sure the frame is mounted flush with the tops of the legs. Then find the center of the longer frame dimension (38” for our example), and mount the joist piece, using the 3” screws put in from the outside of the frame.
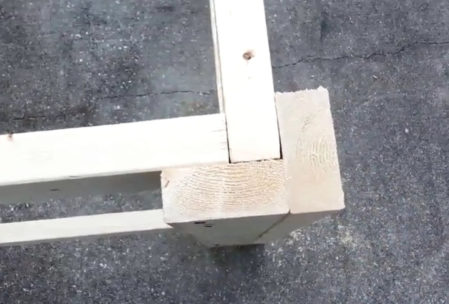
A second frame gets built in exactly the same way, but lower down on the legs – 8 inches above the bottom. This gives the structure added strength, and also forms the frame for mounting an optional lower shelf.
Mount the top
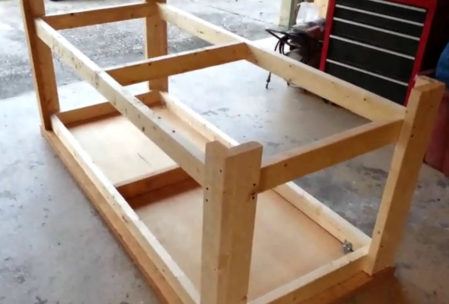
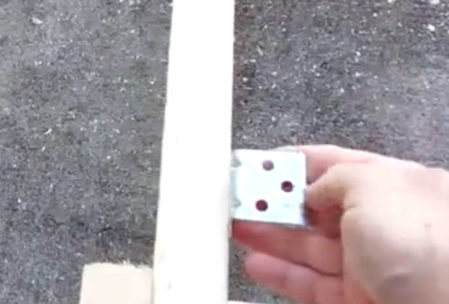
Decide which side of the solid-core door will be the working surface for your bench, and lay it on the ground with that side facing downward. Lay the frame on it, upside down. Attach the door to the frame with the eight angle brackets, two on each side, and one in the middle of each end. Use the 1 ¼” screws for this task.
Customize your bench
It’s a good idea to add a shelf on that lower framework. Use at least ¼” plywood, and I recommend 3/8” or even ½” to add some heft to your bench. Again, predrill the holes and use the 1 ¼” screws to mount it.
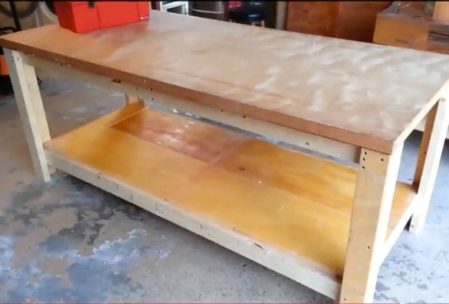
Additional free DIY workbench plans can be found here.
Pallet Wood Coffee Table
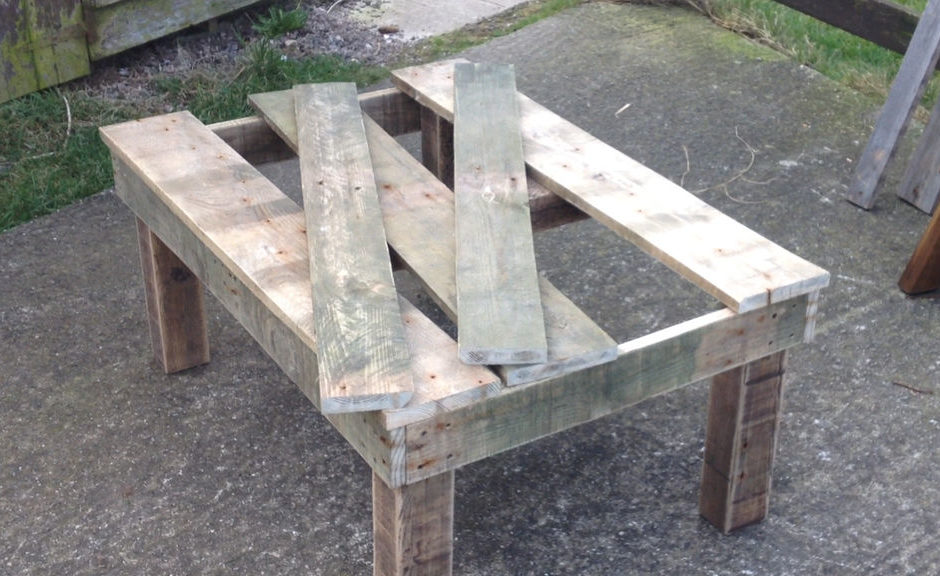
The second of our 2 Easy Woodworking Project Plans for Beginners uses many of the same construction concepts and techniques used to build your bench. To add a twist, here’s one of our easy wood projects that uses scrap lumber, so you can build it for almost no cost! But this is rough lumber that needs a lot of refinement. So, although this is one of our simple wood projects, it’s going to take a good dose of elbow grease for a great result.
Tools
Miter or table saw
Drill
Power sander
Hand planer
Screw Driver
Supplies
1 or 2 pallets, depending on the desired table size and the condition of the pallets
4×4 wood, preferably recycled so it matches the look of the pallet wood. 4×4’s are often used for shipping purposes and are likely available at the same place you find your pallets
1 ¼” inch wood screws
Several grades of sandpaper for the power sander
Stain (your choice)
Polyurethane
Build the frame
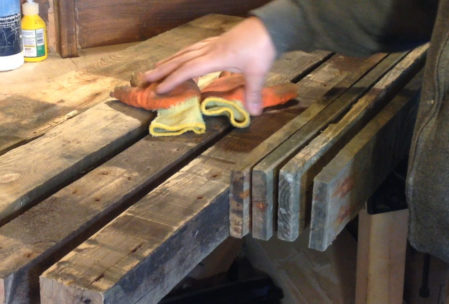
The first step in building anything from pallet wood is, obviously, to dismantle the pallet. Remove all nails and screws, and pick out the pieces you want to use. Give them a good sanding with course sandpaper. 80 grit would be a good starting point.
Just like the work bench we built, we will need 4 legs and 4 pieces of wood to form a frame. Begin by cutting the 4×4 into 4 equal length pieces. A typical height for a coffee table is 16 inches. From the pallet planks, cut two pieces 23” long, and two more 36” in length.
Screw the pieces (I used 4 screws at each end) to the outside surface of the legs so that they are flush with the leg tops. Just like the bench, we want the shorter end pieces to be mounted inside the ends of the long pieces. In other words, when you look at the table from the long side, you won’t see the joint between the frame pieces.
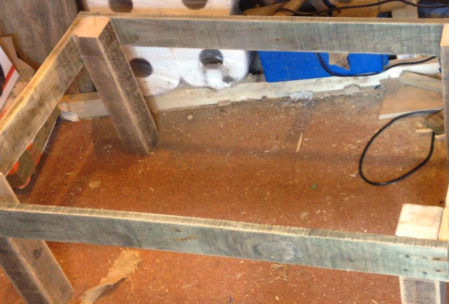
Then, just like the work bench, add a joist piece across the center of the long ends to add stability to the center of the table. I suggest making this out of the same 4×4 material you used for the legs, to give it added strength.
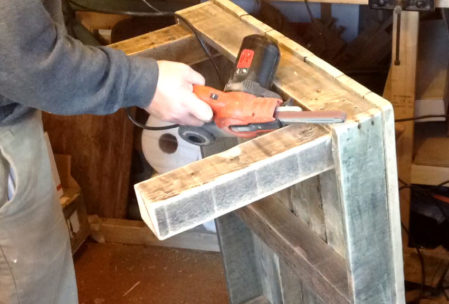
Now sand the entire frame until you just can’t anymore, working your way through progressively finer sandpaper grits. By the time you’re finished, you should be working with 240 grit paper.
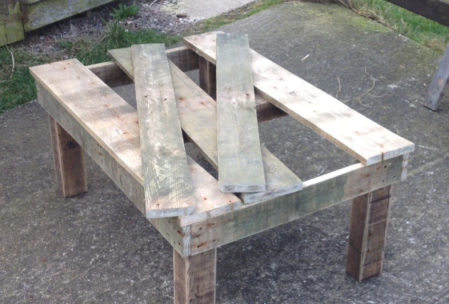
Carefully pick out your favorite pieces of plank wood from the pallets, and cut them to the proper length to cover your table. You have an option here, of either making the top fit the exact size of your frame, or having the ends hang out over the frame an inch or so, just like we did with our bench top.
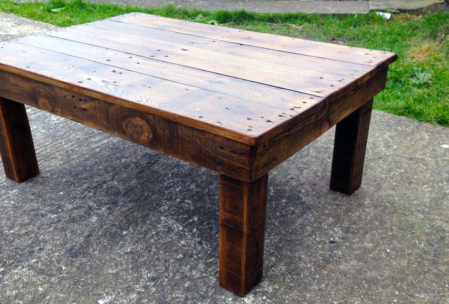
Sand the devil out of these pieces, too, and make sure the edges are straight enough to give you nice, tight joints between the boards. If not, you may have to plane them a bit. Stain the entire piece, and finish with a couple of polyurethane coats for total protection.
Then, set your coffee cup on the table and sit back with a big smile on your face, knowing that you just completed one of our easy woodworking projects that cost almost nothing, but looks like a million bucks.
Conclusion
There you have it! A couple of beginner woodworking projects that you can be proud of for years to come. The first gets your shop ready to tackle these simple wood projects, and the second gives you a place to relax when your done for the day. Enjoy!
Walk through any office furniture store and you’ll see dozens of different desks. Unless you’re looking to spend thousands of dollars on a finely crafted wood desk, you’re going to end up with some variation of a glass and metal pipe contraption, or a pressed-wood piece of junk. Yeah. Beautiful stuff. So you end up jamming it in some little room in the back of the house that you dub your “office” and hope no one ever sees it.
Here’s a better idea. Go to the lumber yard and pick up some 2×4’s, a couple of 2×12’s, a 1×4, and a box of screws. We’re going to build a desk so unique (and so strong!) that you’ll be proud to put right in your living room.
The Materials
- (2) 2”x12”x48” You can buy an 8-footer and cut in half when you get home
- (5) 2”x4”x8’
- (1) 1”x4”x8’
- Wood screws 92 1/2
- Glue
- Paint or stain.
The Tools
- Table or Miter Saw
- Drill and wood bits
- Nail gun
- Pocket Hole Jig
- Sander
- Tape measure
- Pencil
The Pieces
Let’s get all of the sawing done right away. Start by cutting your 1×4 into four 19 ½” pieces. From the remaining 1×4, cut four 3 ½” squares that will become the feet of our desk. Next cut two pieces of 2×4 to a length of 20” each. These will form the upright post in the center of the leg. Now cut four pieces of 2×4 to a length of 22 ½”. This will become the outermost layer of the legs. We will need three horizontal 2×4 supports 37” long. If you got an 8-foot 2×12, cut that in half now.
Here’s a slightly tricky one for you. We need to make two angled support beams with a 120° angle to each end. Cut two 2×4 pieces to exactly 25 3/8”. Each end will now be at a 90°. We need to make it 120°. To do that, set your crosscut to a 30° angle and make the trim, being careful not to remove any wood from the side with the longest angle. Cut the other end with the same angle pointing in the same direction. In geometric terms, you have just created a parallelogram. It has two long sides of equal length, and the two ends are of equal length with identical angles on each end.
Now set your saw to make square cuts again, but angled at exactly 45°. We’re going to be making 24 cuts at this angle, so make sure that saw is set correctly. First, let’s cut the eight supports brackets. The long side needs to be 10 ¾”. Don’t worry about the short-side measurement. If you measure the long side correctly and have your saw set perfectly, the short side will take care of itself. Now we need 4 horizontal pieces for the legs, also cut at that same 45° angle. The long side should be 22 ½”. Put the saw away. We’re done cutting.
The Build
Center the thin boards on each end of the 20” uprights and fasten them with 2 ½” countersunk (and pre-drilled) wood screws.
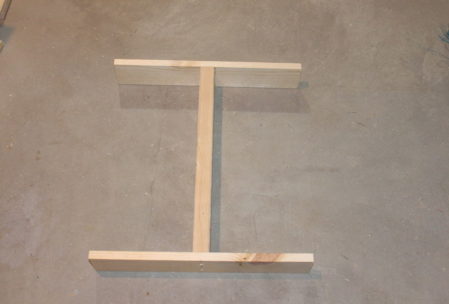
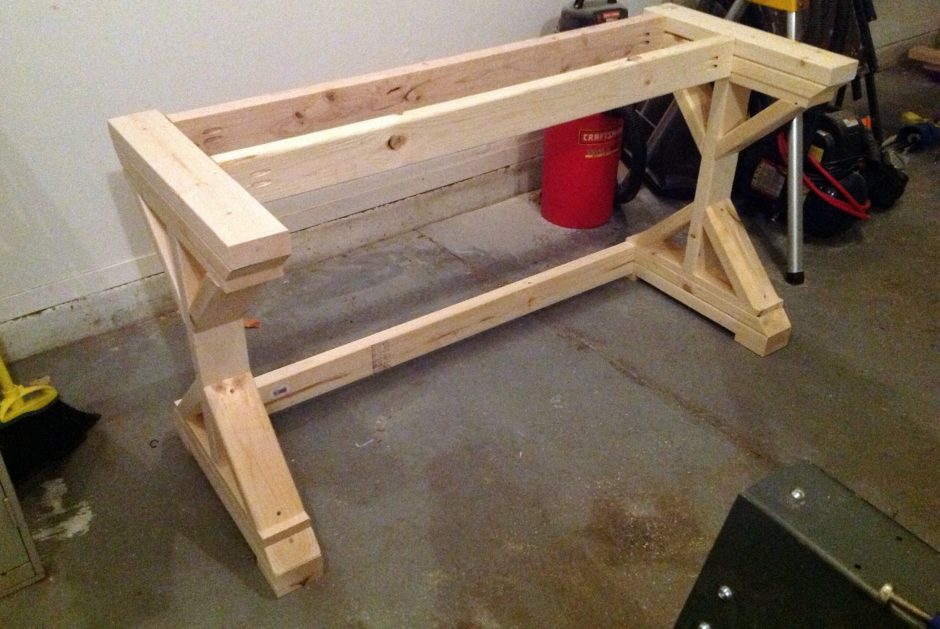
Then add the 8 short support pieces on the inside angles of the legs. You could use a nail gun, as in these photos, or pocket screws. Either way, spread a thin layer of wood glue in the joint, just to keep things nice and tight.
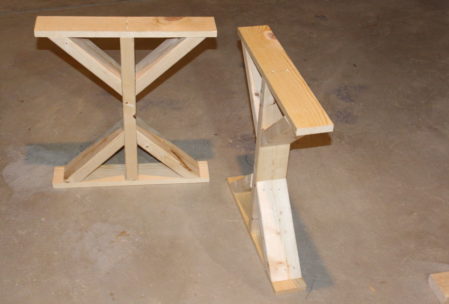
The next step is to nail and glue the 22 ½” horizontal leg pieces across the face of the thin boards on each end. Keep the angle pointing outwards to build the ends in a sort of pyramid shape. Now nail and glue the 22 ½” pieces on top of that.
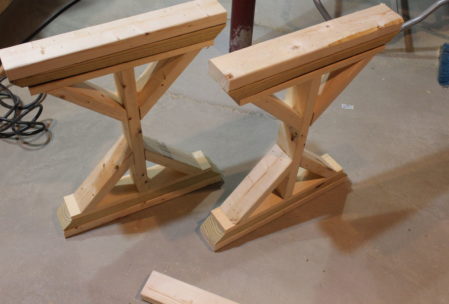
At this point, you should have two identical legs that have a center post, mounted to a 1×4 and two thicknesses of 2×4 on each end, with a pair of braces each way. It’s a good time to sand all of this wood as far as you want to go with it. My design is going to maintain a rough-hewn look, so I’m not too worried about this, but if you plan to add an optional finely finished top to the desk, you may want to get picky with the sanding job.
Now, let’s add the horizontal posts to give our desk it’s final shape. Drill two pocket holes on each end of the 3 horizontal support pieces. Then mount one on the top and bottom of the legs on one side. Remember that you will want to put your chair and legs under the desk, so these horizontal pieces need to be mounted only on what will be the back side of your desk. The 120° angled support pieces get mounted with pocket screws between these horizontal supports. Add the third crossmember in the center of what will be top of your desk. Flip it over and nail or screw those four square feet in place.

While it’s upside down, drill some pocket holes in the top crossmembers, and across the tops of the legs as needed to securely mount your 2×12’s that will serve as the desktop. 2 pocket screws in each leg per board and a couple in that center crossmember should do, for a total of 6 per plank or 12 altogether.
Now sand and paint or stain as you desire.
Options
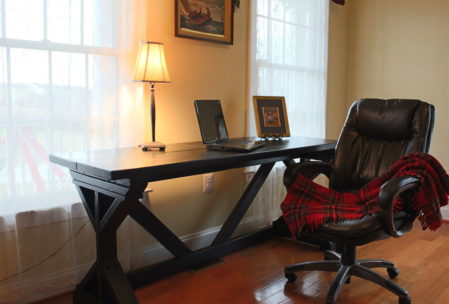
Yes, this is an old-world, He-man looking desk. But the beauty of this design is that it is open to interpretation. If you like the look, but want a smooth worktop, overlay it with a piece of high-grade plywood or even tempered glass. You can finely sand, fill, and paint the legs for a very smooth finish. Instead of 2×12’s for the desk top, you can purchase a piece of countertop, or even granite if you are so-inclined. Instead of using pine, use the hardwood of your choice and give it a beautiful stain. Add a plywood panel with a hardwood veneer face across the backside for a more closed-desk feel. Hang a slide-out keyboard shelf or even a drawer under the front edge. You can even create bookshelves with a miniaturized version of the leg design.
That’s why I call this the Ultimate Woodworking plan for a DIY desk. It’s a basic plan that gives you the option to modify it and create your own expression. Your imagination is the only limitation!
