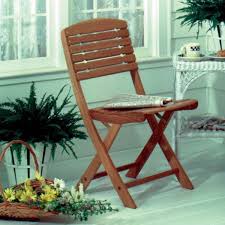
So you want to build a folding wooden chair. Great! But with so many free wooden chair plans out there, how do you know which one to use to learn how to build a folding wooden chair? With this plan, you’ll have a mix of comfort and functionality, with style and ease to go along with it. Try out this outdoor wood chair plan today!
Step 1: Shape Your Patterns and Cut
The first thing you have to do is put together full-sized photocopies of the front and rear leg as well as the seat support. On a 1/8 inch-thick hardboard, place the patterns with some spray adhesive. Cut the extra side with a bandsaw, then sand until you reach the line. Cut the pieces to shape with the same procedures used to make the patterns. Drill 1/16-inch reference holes a quarter inch deep at each centerpoint. Then place twenty brass inserts on the front legs. Sand the parts finally to a smooth surface and proceed to the next step.
Step 2: The Stretchers
Prepare some overlength blanks to turn into your stretchers. Place a half inch round-over bit on your router, and then rout the blank into a dowel. Make sure to mark lines indicating where to start and stop. Now sand the stretcher until it is smooth. Cut both the front and rear stretchers: the front to 17 and 5/8 inches and the rear to 16 inches. On your tablesaw’s miter gauge, place an extension. Secure the tablesaw and cut a test tenon.
Make sure to the check test tenon and how it fits in the ¾ inch hole that was drilled out previously. Adjust the blade until the test tenon fits perfectly, and now cut the stretchers’ tenons. On your workbench, clamp a stretcher. Now mark the kerfs on each end of the tenon and cut them to the shoulder with a backsaw. Sand until it is smooth.
Step 3: Assembling the Stretchers and Legs
Fit together the stretcher and the legs without any glue. Clamp these pieces together; the tenons’ shoulders with the legs. With weatherproof glue, now you can clamp the pieces together. The curved side of the legs should be faced upward, allowing the four points to press against the saw table’s flat surface.
Keep parallel spacing by clamping the scrapwood spacers. Now align the kerf; keep it straight against the foot’s angle, allowing the wedges to stay at the same level as the floor. Tap the wedges in place with your hammer after gluing them. When everything is dry, unclamp the pieces and sand the edges.
Step 4: The Seats
Rip half inch-thick stock, creating the back and seat slats for your chair. Try to rip a few extra pieces for later, for use with machining operations. Now rip half inch-thick stock, three inches wide, for the oversized blanks for the slats. Crosscut the slats to length; use a stopblock on your tablesaw’s miter gauge to keep everything uniform.
At the end of each slat, cut rabbets. Photocopies of the slats should be made, which will be attached to the hardboard. To clear the waste and sand the line, use a bandsaw. Drill a reference hole to mark the screw’s centerpoints; use these holes as guides to drill reference holes into the slats, a quarter inch deep. Place a 1 ½ inch sanding drum on your drill press and proceed to place the 3 inch wide fence underneath the drum. Give the sandring drum clearance with a large cutout in the fence, then use the bandsaw to shape it.
On the fence, place a stopblock then pivot the slat over the drum to help smooth what you have cut. Mark the locations of cutouts on the back. Finally, cut the notches and sand. Next, with a 3/8” round-over bit on your router, readjust the fence flush with the bearing of the bit. On these parts, round over the curved edges. Drill countersunk holes in the slats where marked with a stopblock and fence on your drill-press. Sand everything to a final smooth quality.
Step 5: Attaching the Slats
Place the front seat slats between the seat supports; clamp these slats to the support to keep the assembly fit. With the holes you drilled as your guides, place 7/8” deep pilot holes in the seat supports, then screw. Apply glue on the rabbets. Afterwards, place a ¼ inch thick spacer in the space between the first seat and front seat slats. Do this again until all the seat slats are worked on. Now you can sand the ends of the slats and glue and screw the top and back slats on the assembly.
Step 6: Shaping the Brass Parts
You will use two straps per chair, so it is important to make one photocopy for each strap of the brass strap pattern. Shape the blank with a bandsaw or a scrollsaw, and smooth the blanks’ ends with a disk sander. Use a scratch awl or centerpunch to indent holes in the centerpoints. Drill these holes with your drill press. Finally, cut brass pipe nipple to ¾ inch lengths with a hacksaw or a scrollsaw, then file each end square after you are done with cutting.
Final Step: Assembly
Before you assemble it, you will want to test assemble your chair; do this by sticking the seat assemble to the front-leg with screws and brushings. Now attach the rear to the front, and attach brass straps with more screws. If the assembly fits properly, you’re ready for a real assembly.
Disassemble your test assembly and then place the brass pipe-nipple bushings with epoxy. Sand if you still have to. Finally, it’s time to finish your assemblies, with four coats of Miinwax Fast-Drying Clear Satin Polyurethane, then wipe it off with tack cloth, ensuring the sanding dust is all removed. Now reassemble the chair for the final time with a thread-locking compound, and enjoy your foldable chair! Did you enjoy learning how to build a folding chair? Try out some more foldable chair plans here!