7 Wood Joinery Techniques for Beginning Woodworkers
There is nothing more satisfying for a woodworker than to watch two pieces of wood become perfectly mated together as you tighten the screws, set the mortise and tenon, or slide the dovetails together. Creating the perfect joint that permanently turns two pieces of wood into a seamless, enduring creation is after all, the essence of what we do in our shops.
But perfect joinery is also the hardest thing to master. There is simply no room for the slightest error. One miniscule mistake of cutting or even sanding can turn a carefully honed piece of your final product into nothing more than scrap lumber. But fear not, my humble beginner, for you are in good company. Every woodworker on earth can point to a heap of scraps. You’re in good company.
What separates the Greats from the Rookies in the shop is more about knowledge and the right tools than it is about superhuman skills. So, let’s get you equipped with some of the Right Stuff it takes to bring your woodworking to the next level with 7 wood joinery techniques that are sure to “Up” your game.
Glue
Human beings have been using some form of glue to hold things together since a caveman in what is now Italy figured out that he could hold two rocks together with birch bark tar to create a simple axe. Humans have come a long way since that day, and so has glue.
While there are many types of glue on the market, the one best suited for wood joinery is commonly known as “carpenter’s glue” or “yellow glue” because, well, carpenters use it and it is yellow. Technically, it is known as Aliphatic Resin Emulsion. It adheres well to wood, doesn’t require a thick application, and lasts a long time.
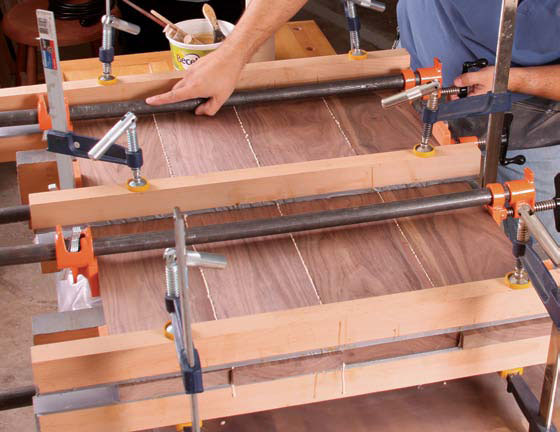
The best glue joinery involves smooth, well-matched edges. A small amount of glue is spread thinly across both joint faces and the pieces are firmly clamped together until the glue dries. Excess glue that seeps out of the joint will seal the wood grain and spoil any chance of staining the wood. There are two schools of thought on how to deal with excess glue. One is to wipe it away immediately with a damp cloth. This can work if the amount of excess glue is small. However, if you have large gobs of glue squeezing out, trying to wipe it away can result in spreading the glue over more of the surface area that you are trying to protect. A better choice may be to let the glue dry until it begins to darken in color, then trim it away with a sharp chisel.
Gluing is so fundamental that it is an essential element of every other form of joinery that we are going to discuss. You won’t get away from glue, so learn how to use it correctly.
Pocket Screws
The wonder of great joinery is that two pieces of wood seem to be held tightly together by an unseen force. In reality the force is very tangible – you just have to know where to look. Pocket screws are a great way to hide the force.
A pocket screw is inserted at a sharp angle into one side of a piece of wood so that it will project out the grain end of that piece and into the piece to which it is being joined. It’s a simple concept, but with angles and measurements that are very difficult to calculate. But fear not! We don’t need to do the math because the engineers at Kreg Tools have done it for you.
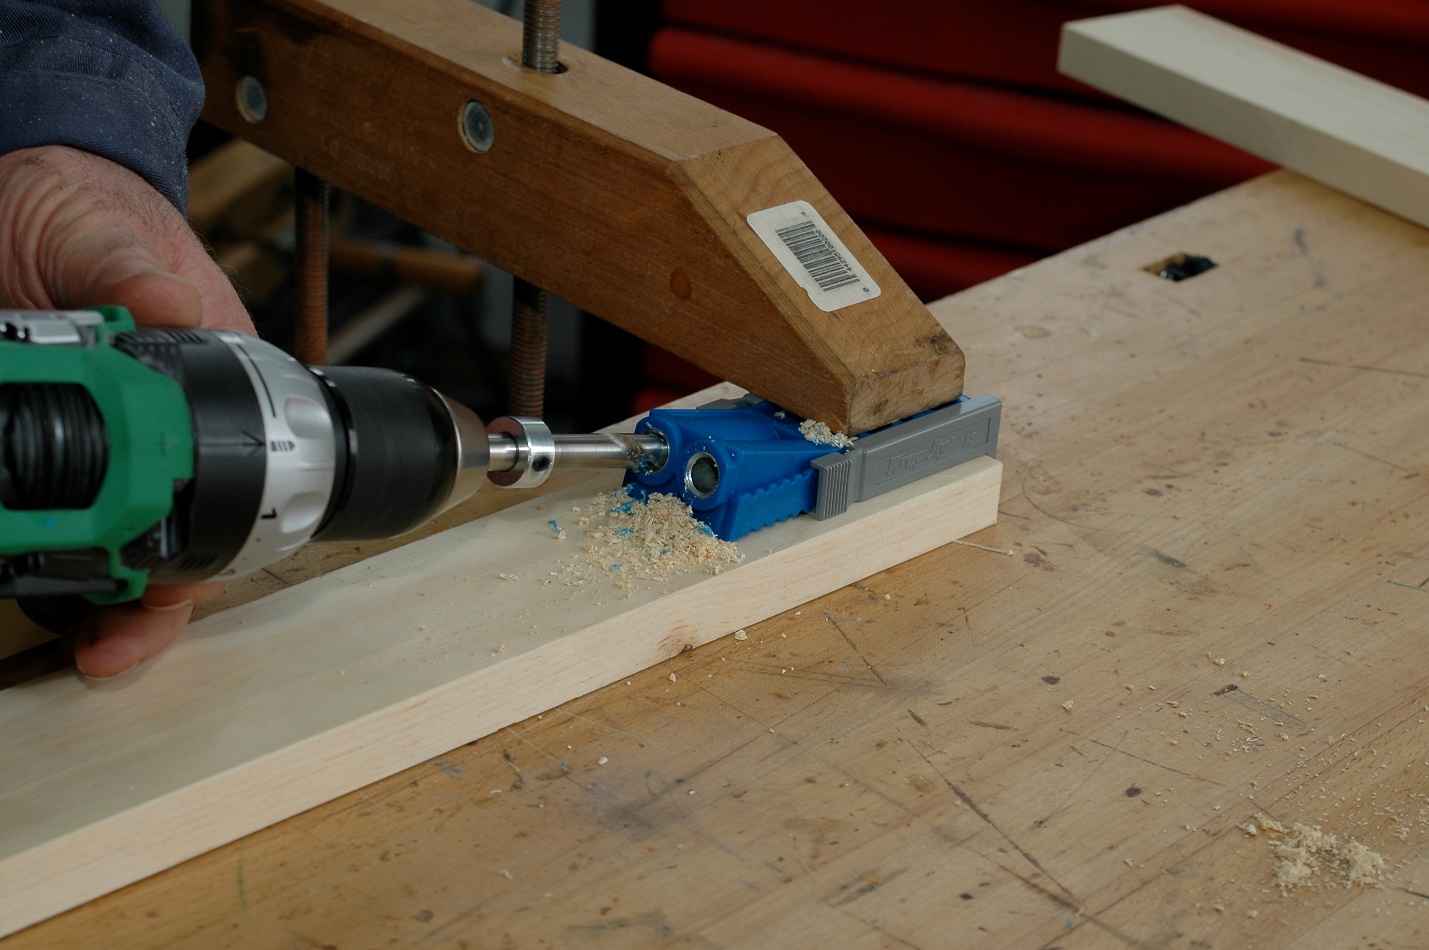
For about $45 bucks you can arm yourself with the Kreg Jig® R3 kit that will have you making perfect pocket screw joints every time. The kit comes with a jig for drilling perfect pocket holes, along with the drill to do it, a sampling of pocket screws and the special square-tipped driver to tighten them.
Just set the length of the jig’s adjustable arms to the thickness of wood you are working with and clamp it to the face of the board. Adjust the lock ring on the drill bit to the proper depth (there’s a gauge built right into the kit’s case) and run the drill bit into the rig until you reach the stop ring.
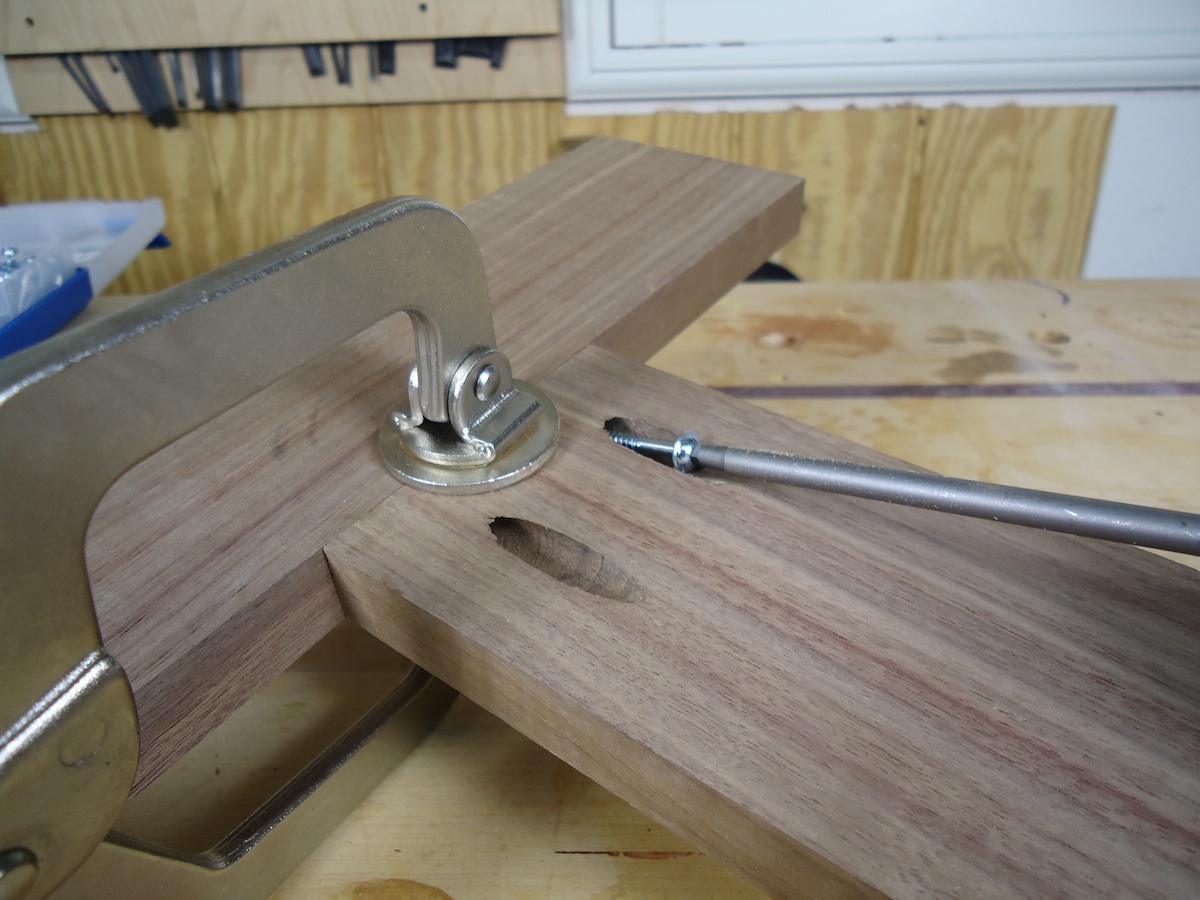
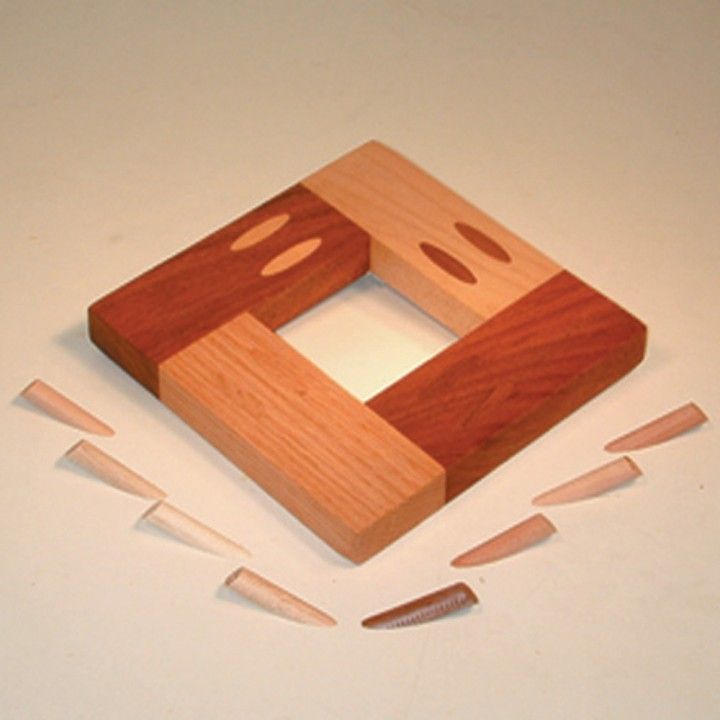
Remove the jig, apply a thin sheen of glue to the two edges being joined, insert the pocket screws into the holes and drive them tight. Wipe away the excess glue and let it dry. You can even take things a step further by gluing angle-cut dowel pieces into the pocket holes and sanding them smooth with the surface of the wood. You just created a very strong joint with invisible screws. Or, in the case of the example below, you can use the dowels to create interesting offsets.
Biscuits
No, I’m not talking about using Grannie’s day-old biscuits to gum a couple of pieces of wood together. The biscuits I’m talking about are thin, oval-shaped chips of compressed wood shavings (usually beech wood) that fit neatly into slots cut into the two edges to be joined.
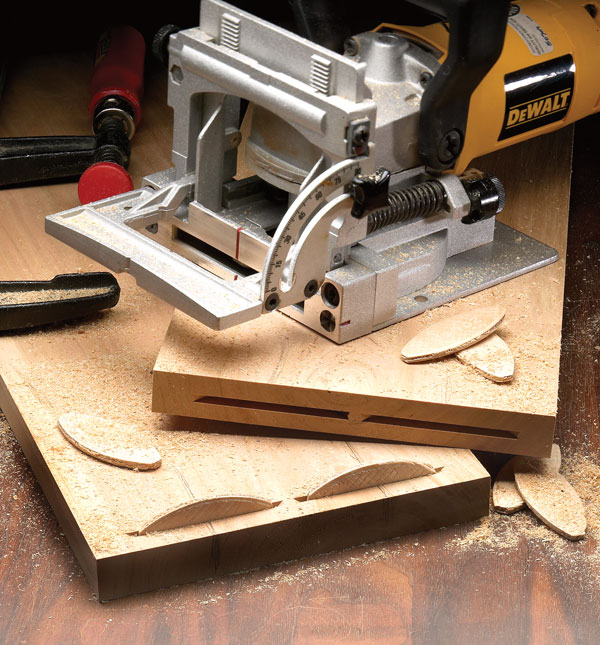
When glue is applied to the biscuits, they swell up from the moisture and (along with the glue) form a very firm, strong bond between the pieces with no visible attachment from any angle. Biscuit joints are perfect for fine cabinetry work and edge-to-edge joinery where the desire is to completely hide any hint of joinery technique. A table top made of multiple pieces of wood joined side-by-side is a perfect example of where biscuits would be used.
The trick is that the slots cut into the two faces to be joined must be perfect. So perfect, in fact, that there is a special tool called a biscuit joiner (sometimes called a plate joiner) designed just for making these edge cuts.
Miter Joint
Two pieces of wood, each cut at a 45° angle form a perfect corner. Put four pieces of equal length together with four mitered corners, and you have a square. This is the fundamental shape of all woodworking (except lathe work, which is a woodworking art form all of its own).
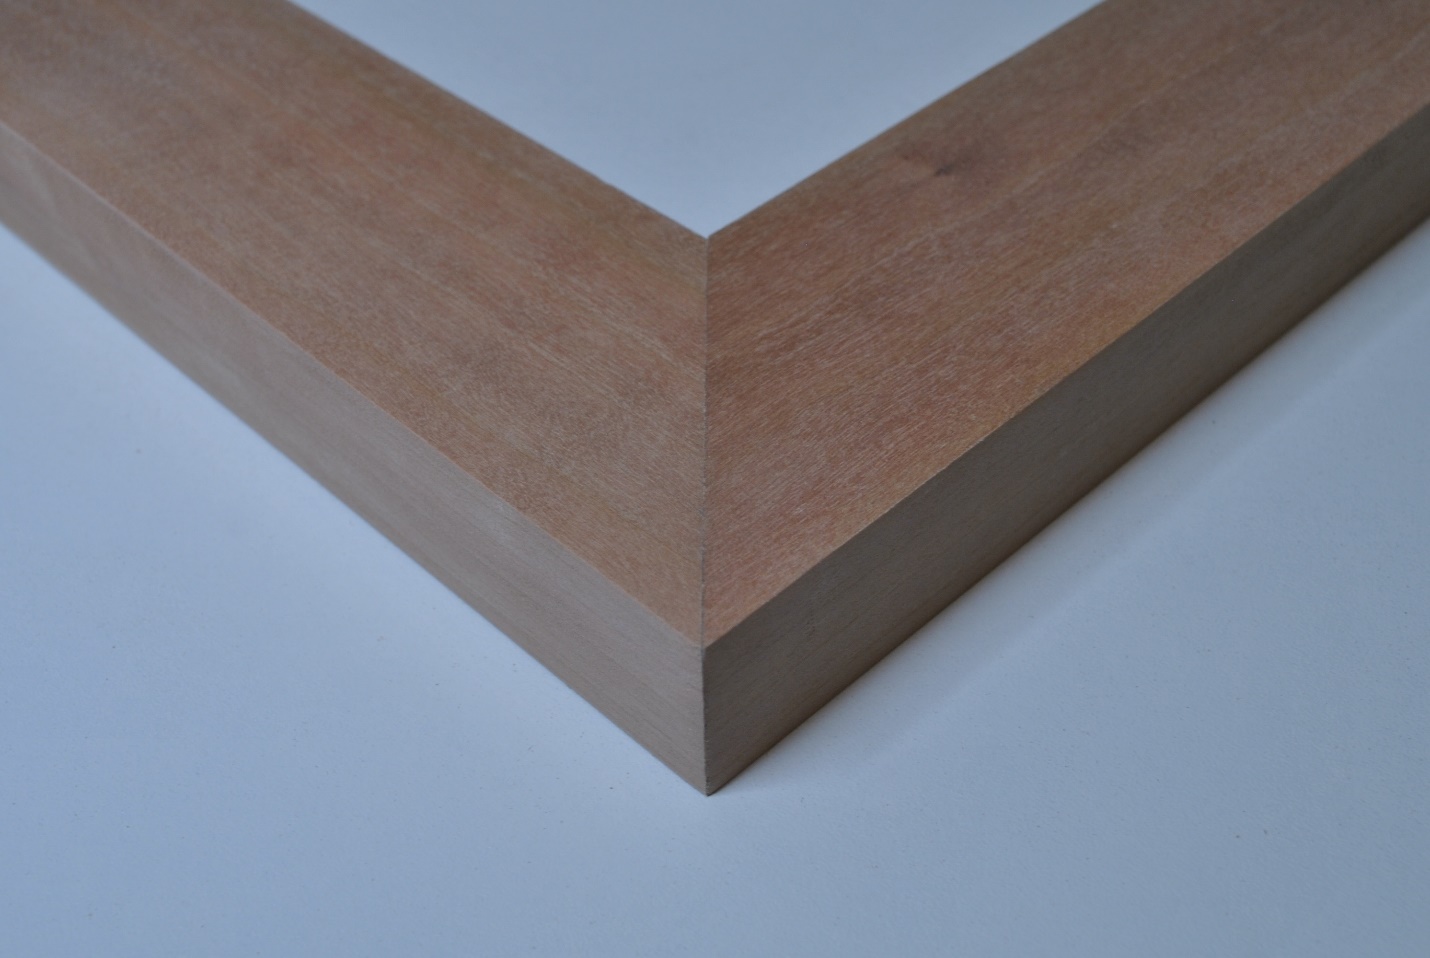
The miter joint is a beautiful joint. It allows the grain of two pieces to create a symmetry that is very pleasing to the eye. That’s why mitered corners are often employed on trim pieces and other forward-facing elements of a design.
It is, however, not the strongest of joints. While it does provide a wider gluing surface than a straight butt joint, a miter cut usually needs some help. Biscuits or pocket screws can be employed to help strengthen a miter cut.
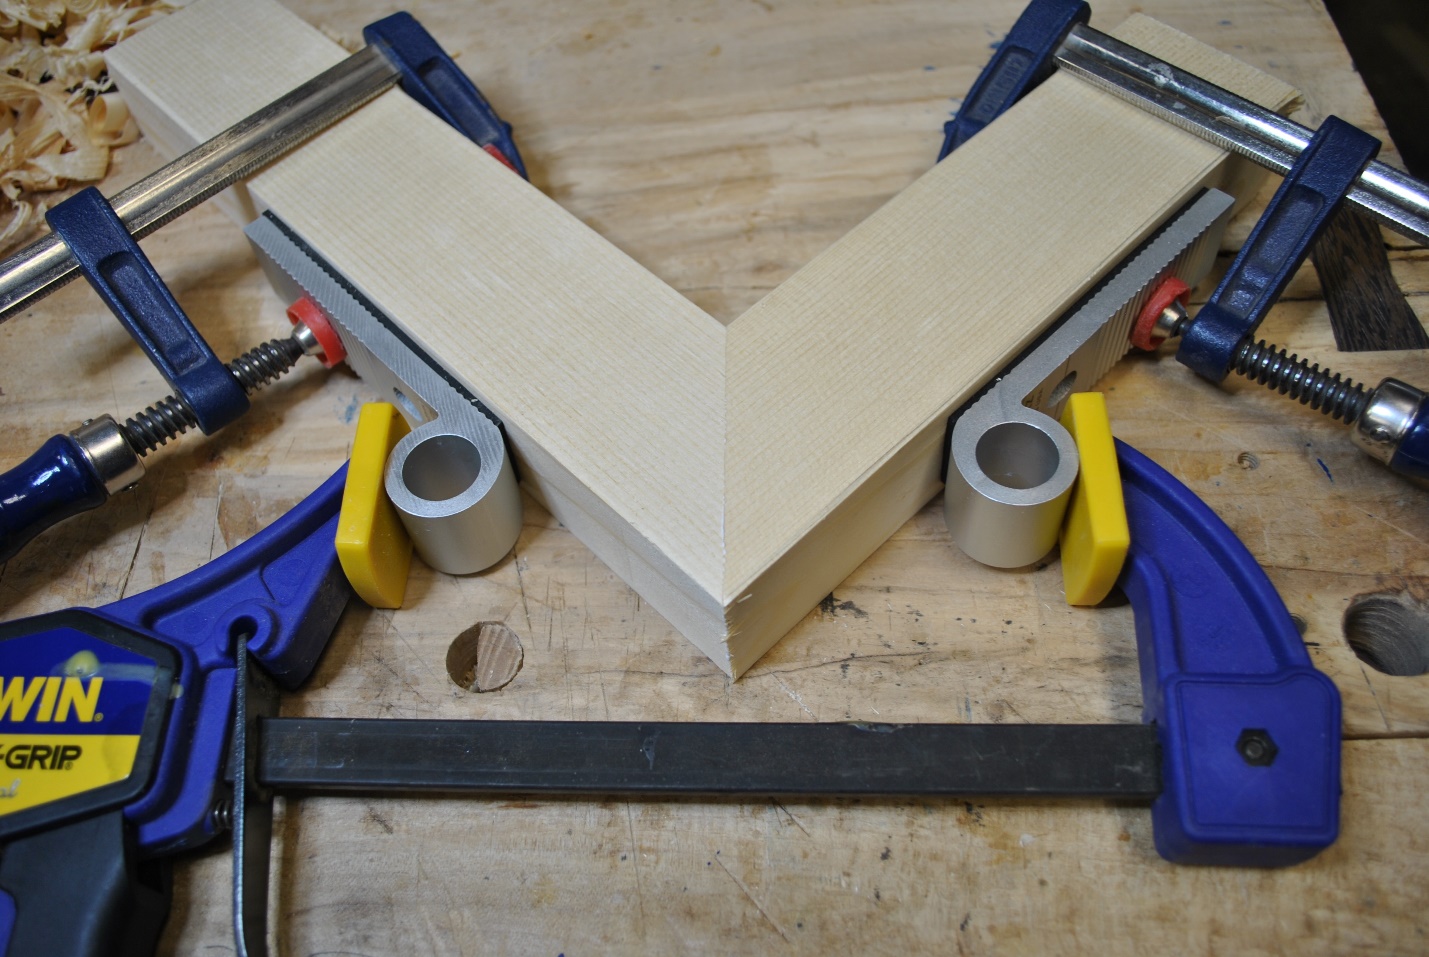
It is also necessary to be sure the mitered surfaces fit perfectly together. Since the mitered joint is a true design element, it means the alignment of the edges must be flawless.
Dado Joint
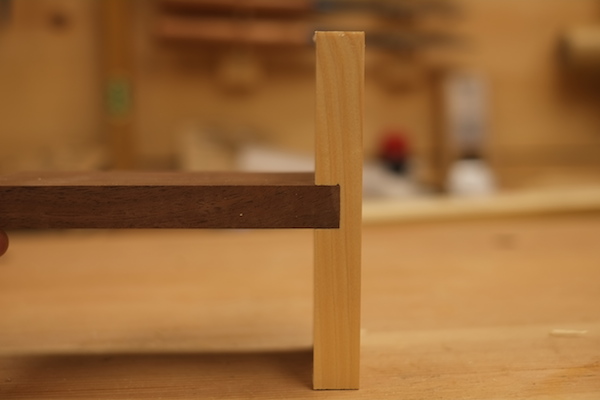
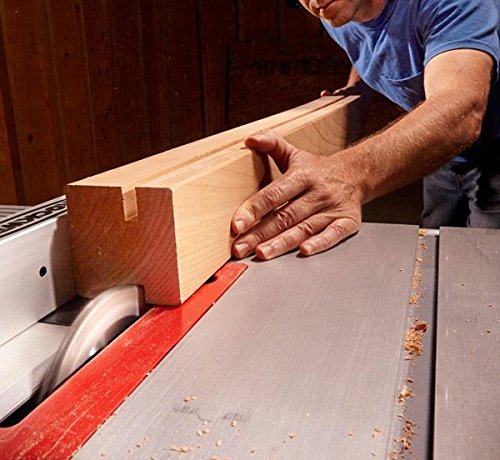
A dado joint is very handy where you want to join an edge into the middle of another piece of wood, for example a bookshelf into the frame. There are two basic ways to create the dado groove. The first is by using a table saw and a blade set known as a stacked dado head cutter. This consist of 2 saw blades with “chippers” that can be placed between them, like spacers. By “stacking” more chippers between the blades, you can create a wider groove to accommodate thicker stock, and vice versa.
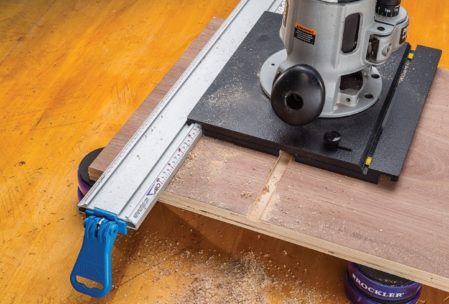
The other method is to use a router and straightedge or specially designed router jig to create the dado groove. Be careful as you do this because running your router at too high a speed can result in burning the wood.
Whichever method you use to cut the dado groove, remember not to cut too deeply into the stock. A general rule of thumb would be to cut a dado no deeper than one-third the thickness of the pieces you are cutting. Any more than that can lead to structural weakness. For example, if you are cutting dado grooves for shelving into a ¾” thick standard, make the cuts no deeper than ¼”.
Mortise and Tenon
There was a time when woodworkers didn’t have things like pocket screws, beechwood biscuits, miter saws, and dado head cutters. They had to figure out how to permanently join two pieces of wood together without any hardware. The mortise and tenon joinery method is one of the oldest in woodworking, but it’s every bit as good today as it ever was.
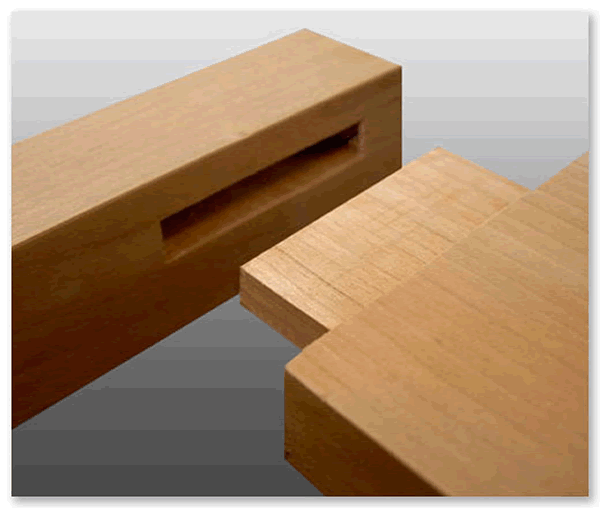
The mortise is a cavity cut into a piece of wood, and the tenon is the end of the adjoining piece that is cut down in size to fit snugly inside – with glue, of course. There are varieties of mortise and tenon joints that employ wedges and other methods of securing the joint as well. In fact, even the biscuit joint is a form of mortise and tenon, but let’s stick to the basics for now.
At that basic level, a mortise and tenon joint is really just a peg stuck in a hole. It’s how you get there, and how you turn it into a perfect joint that makes this an interesting joinery method.
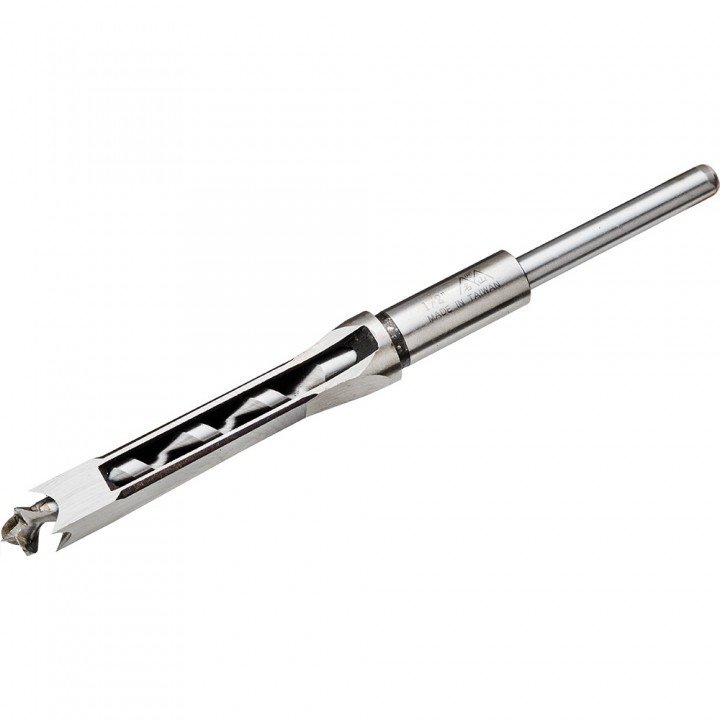
The mortise can be created using a drill press, by drilling multiple holes very close together. There are even special drill bits with chisel-like attachments that create square-edged drill holes. The tenon is accomplished by sawing or milling the end of the adjoining piece to the proper dimensions.

Another method is to use a router in a specially designed jig, like the one from Trend® that makes quick work of creating perfect mortise and tenons in a variety of designs. One of my favorites creates a mortise and tenon based on a mitered corner. Class and strength all at the same time!
Dovetail
This is the pinnacle in all of joinery. The dovetail provides immeasurable strength, a large surface area for gluing, and flat-out looks cool. Nothing says “I know my way around a woodshop” like a piece built with dovetail joinery.
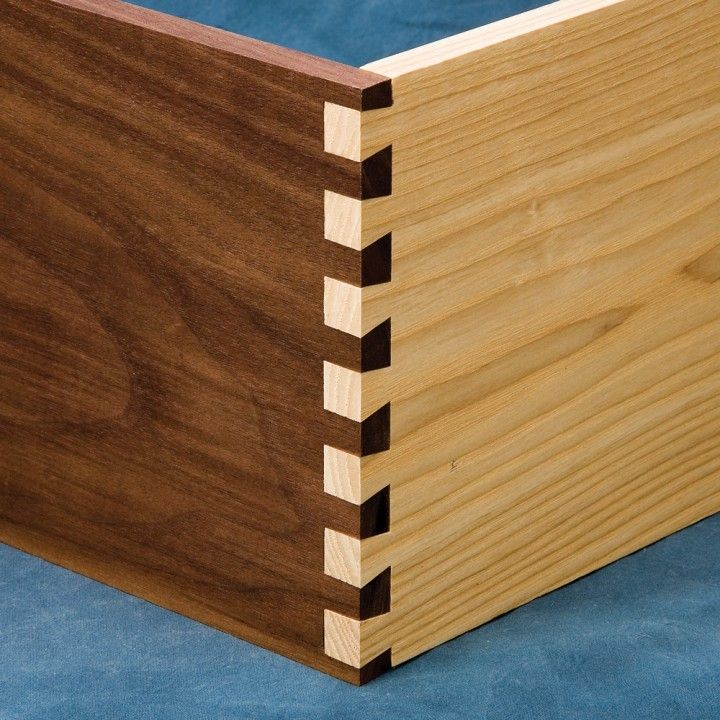
The tensile strength of a dovetail joint can’t be beat. It is comprised of a series of “pins” that are cut in a trapezoidal shape to mesh perfectly with an opposing set of “tails”. When these pieces are glued together they form a joint that is virtually impossible to pull apart. Dovetail joinery is most common in box-shaped items such as drawers, jewelry boxes and cabinets.
There are many ways to create dovetails. There are router jigs, saw blades, and hand-carving techniques. A review of just the jigs available would make a website all of its own. I’m not saying it’s the best, but there is a 12-inch jig for routers from Porter-Cable that is widely available at big box lumber and hardware stores.
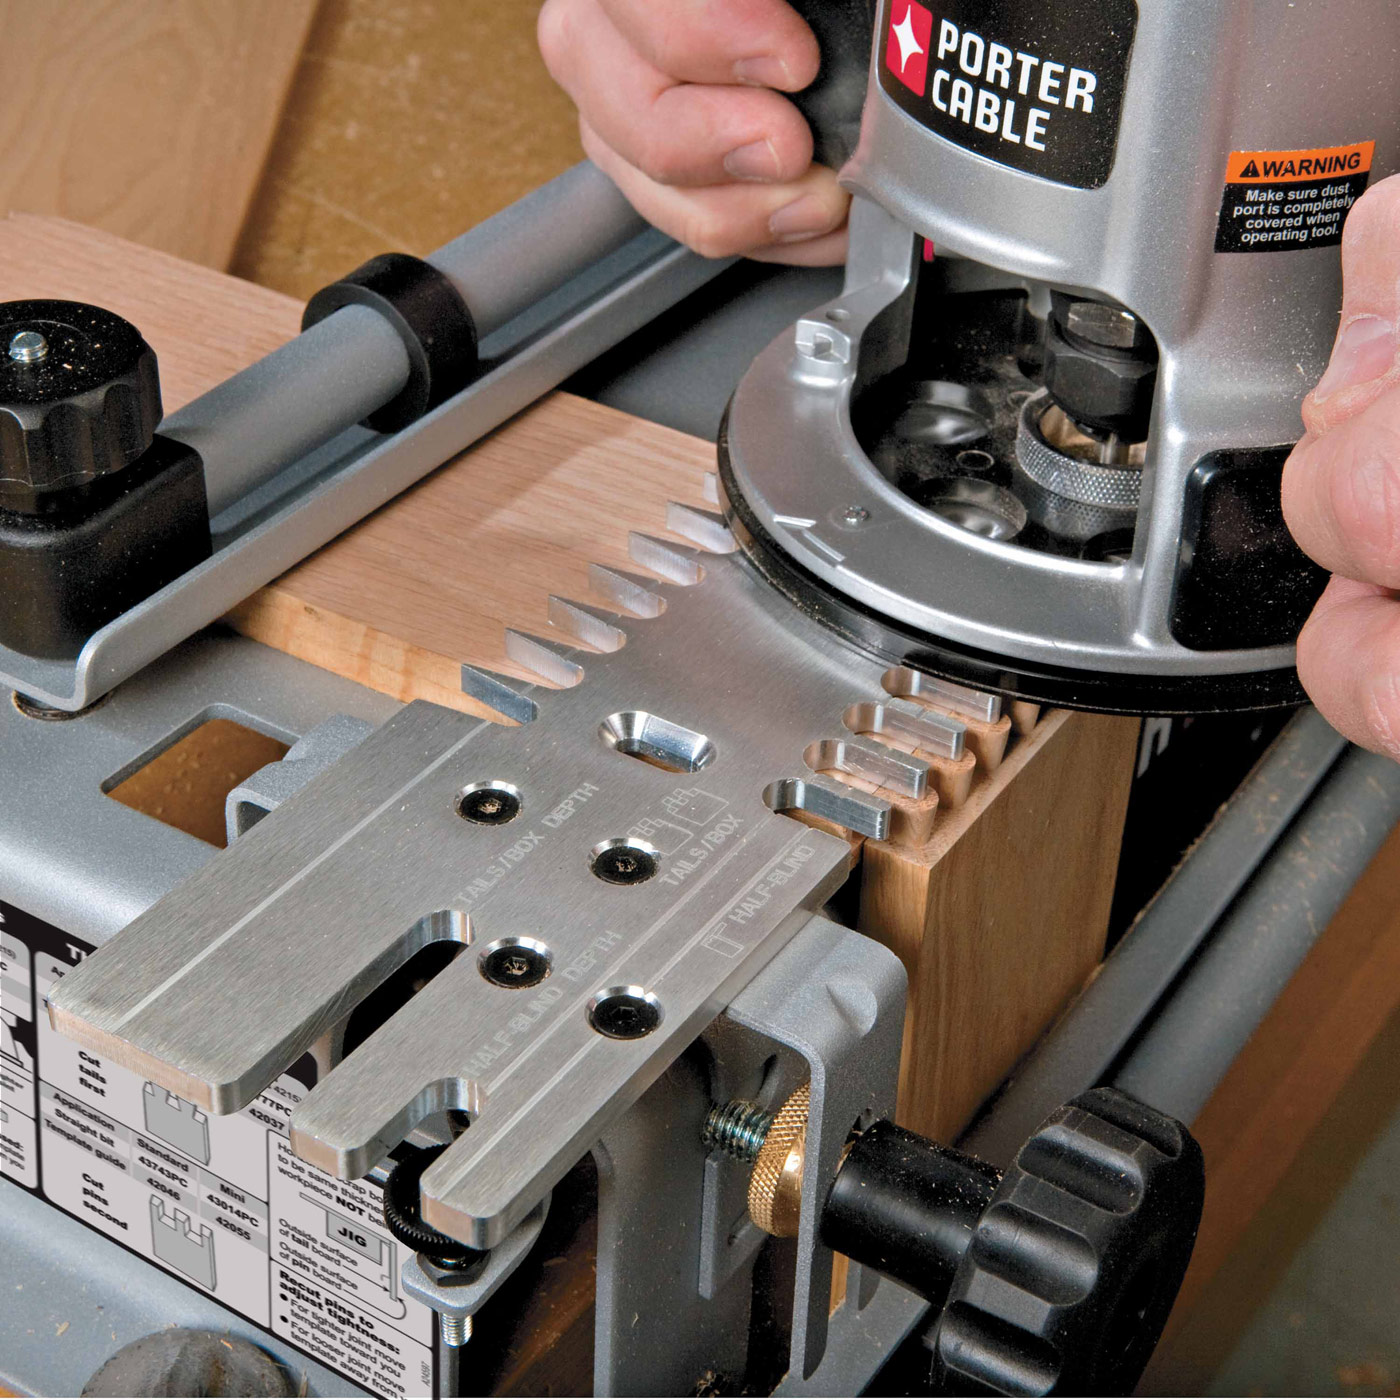
It makes quick work of creating perfect dovetails every time. The Dovetail joint is as versatile as it is strong and should be a go-to choice for any woodworker.
Conclusion
That is my list of seven joinery techniques that every beginning woodworker should learn to master. Bear in mind that for each of these there are hundreds of design variations and they can be scaled up and down in size in many ways. But with even a basic knowledge of these joinery techniques, you can make just about anything. 3 easy woodworking project for beginners can be found here.
These joints really aren’t that hard to do as long as you stick to my sound fundamentals of wood working: Measure twice, cut once; Buy high quality lumber; Use the correct tool for the task; Don’t hurry; Practice safe procedures; Measure two more times before you make that cut.
Leave a Reply