How To Build A Garden Storage Wood Shed?
A garden shed can be a wonderful addition to any home’s backyard, but learning how to build a garden storage wood shed can be pretty tricky. However, by looking through the best wood shed plans, you can actually find one that can make building one pretty easy. Whether you want a simple lean-to or a large-free standing building (or one of any other of the many garden shed designs), you can find garden shed plans for all types.
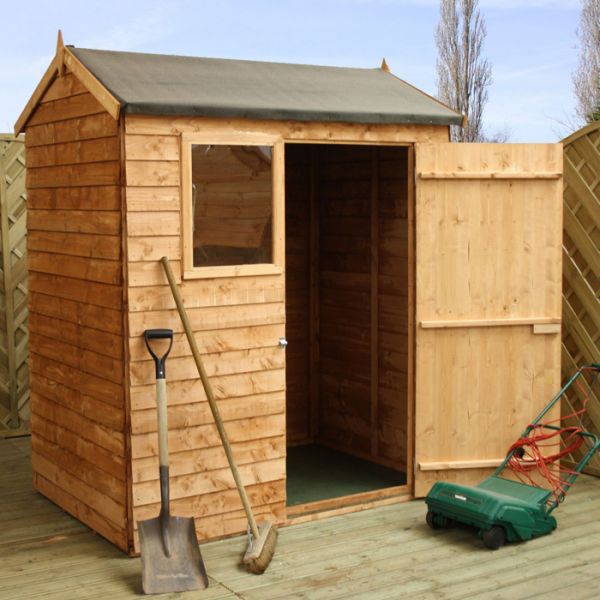
With this plan, you’ll find yourself making a modest 6 x 8-ft garden shed, which can hold all of your tools but doesn’t completely dominate your backyard. With this straightforward and easy design, you’ll be able to build your one or several outdoor storage wooden sheds in no time.
Step 1: Preparing the Site
The first thing you’ll have to do is mark out the site of your future shed. A lightweight frame that will be the exact size of the shed is best for this. You can build this frame from ¾-inch thick pine, with screws in each corner fastening the sides together in a rectangle.
Clear the site of your shed and tear down any high spots. Adjust the frame in position until you find a suitable place for the shed, then mark the corners with stakes and remove the frame. At the highest corner of the site, start your excavation for your first foundation corner block. Dig out an area larger than the block, with about two or three inches of crushed stone to act as the base for the block.
Now you can position your block, which should have three to four inches exposed above the ground. Make sure that the block is secure with the crushed stone, and then add the other corner blocks the same way.
Step 2: The Floor
For the floor, the best material is pressure-treated lumber. 2x 6 stock to length is needed for the back and front rim joists; lay these out on 16 inch centers. Use nails to stick joist hangers on the inside of every inner joist, then set the joists between the corner blocks and position these floor joists. Nail them in place, then make sure to secure the back and front of the floor frame with the outer rim joists.
Step 3: Making the Wall
For the window and door headers, you will need 2 x 6 stock. Nail these header pieces together, and then cut 2x 4 stock to length for door jack studs, wall studs, and windows. On the wall stud, nail each jack stud, then nail 2 x 4 spacers between a pair of studs to create the four corner posts.
Next you will want to frame the back wall. Lay out the stud locations on bottom and top plates, and then set the framing members on the deck. Secure the bottom plate and the top plate by nailing through and into wall the wall members. For the window opening you will want to frame it with nails as well.
Now examine your wall and adjust the current assembly if required, until it becomes square. Afterwards, use 6d nails about six inches apart to set a half inch plywood sheathing. Brace the rear wall by nailing 2 x 4s between the wall and the outside floor joists. TO make the plywood sheathing flush with the deck’s edge, nail the bottom plate to the deck.
Put a frame over the front wall and brace it after standing it. Then repeat with the side walls. Nail all the walls at the corners, and install the wide wall top plates to keep them standing. Check if they are straight with a level.
Step 4: The Roof’s Frame
Spread your 5-inch pitch on the roof rafter with a framing square, then cut the rafter to use as a pattern for a second rafter. Make sure that both of these fit properly before cutting out the rest of the rafters. Now, use a half inch thick plywood from where you will cut a gusset. Draw the roof truss’s outline on the surface of the plywood. Then nail the rafters and gusset together with 2 inch roofing nails.
After nailing the trusses to the walls—both rear and front—make sure to keep the inside faces of the trusses with the gussets at the gable ends. For the subfascia, you will need to cut 2 x 6 stock to length; nail these boards to the rafter ends before installing your gable-end sheathing, then over the gable rafters you will want to nail your pine furring.
For the back and front soffits, you will want to rip cedar stock to width. Nail the subfascia, rafters, and soffit boards together with galvanized nails, then install the fascia. Finally, while installing your roof deck, make sure to let it overhang the fascia by about half an inch. Apply toe roofing felt after nailing aluminum drip edge to your roof’s eaves, and lastly, along the rake edges you need to install the drip edge.
Step 5: Roof and Sides
About halfway up the wall, you’ll need to place about 2x 4 nailing blocks between each stud, because of the vertical installation of the tongue-and-groove siding. It will help to complete the roof trim before applying your siding, if you ever intend to paint or stain the trim a color different from the shed siding. Do this by installing the siding boards at a single corner. Fasten the boards with 8d nails; drive the nails diagonally through the tongue, allowing the heads to hide. The nailheads should be a little below the surface of the wood.
Step 6: Doors and Windows
It’s now time to install your window and door jambs. The jams should be nailed directly on the framing. The sill pieces should be sloped around five degrees pointing to the outside; next, cut the side jambs and add the top jambs to secure it. From 1x cedar stock, cut out your stops for the windows, then use galvanized nails to install the outer stops. The inner stops should be installed after you have placed the windows in the openings.
Cut your pieces of shed corner boards and door and window trim from rough-sawn cedar, then nail these in place. When clamping on the siding boards for the shed door, don’t use glue, just joints. Screw the battens to the inside of the boards. Then install the door hinges in bored pilot holes, and position the door with a quarter inch of space on every side. Nail the doorstops in place on the open-side and top jamb. Finally, paint or stain as you please. Never find yourself asking how to build a garden storage wood shed again!
For additional woodworking plans, please visit JoineryPlans website
Leave a Reply