Free Step by Step Plan for Building Wooden Jewellery Box
It’s the perfect gift for almost any lady. A jewellery box. Now add the fact that it’s made by a loved one. The box itself is the valued item now. And you can do this for your loved ones with this free step by step plan for building wooden jewellery box. We promise, it’s not as difficult as you think.
Step 1: Pick the Perfect Style
This is one of those exciting small woodworking projects you can easily customize to make it extra special for you or the one you gift it too. What are your preferences?
Wood Type
You must pick a type of wood to work with. Think of colors that fit your room’s décor or someone’s personality. We advise you work with:
- Oak
- Mahogany
Size
Because building wooden jewelry boxes are simple you can adjust the size to the requirements. Below we use a set of measurements that are appropriate for most people’s uses. But customize them to suit the available space or number of jewellery pieces it must contain.
Step 2: Plan and Prepare Well for Small Woodworking Projects
Never start small woodworking projects if you haven’t assembled all necessary tools and resources. If you’re only starting out with this hobby, the article Top 7 Essential Woodworking Tools for Beginner Carpenters will help you prepare. Don’t be tempted to skip this step. Stopping in the middle of your project wastes time and looking for a tool takes away your focus. What if you forget an important step and your project is ruined? Proper planning prevents mistakes.
Here are the basic items you’ll need for this DIY project:
- Tape measure
- Selected wood
- A saw
- Sander
- Try square
- Screws
- Glue
- Biscuits to join pieces together
- Wood finish
- Rope or tubing
Are you ready for this?
Step 3: The Creative Process Starts – Creating Your Panels
Let’s make it easy if you’re a beginner. Here are sizes that work:
- The sides and lid should all be ½” thick. This is easy to work with and won’t make the box too heavy.
- Cut your wood panels to these sizes:
o The lid: 7.88”x10.25”
o Front and back panels: 2.5”x10”
o Two sides: 2.5”x7.63” - The bottom doesn’t have to be from oak or mahogany. Use plywood and cut it to size: 7.06”x9.44”
You create these pieces by:
- Sanding and planing the wood to the correct thickness.
- Cutting wood to size.
- Leaving wood for a few days to acclimate and distort. You don’t want this to happen after the box is assembled.
You also need the following preparations for assembly:
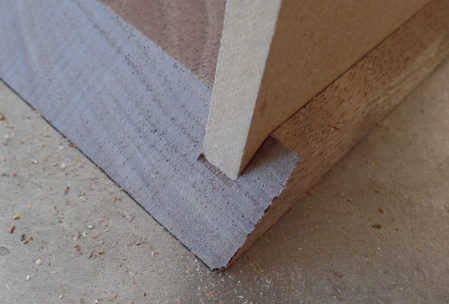
- Cut miters with a blade or saw. Read here if you’re unsure how to get this exactly right.
- You need biscuit slots in each miter
- All the sides require grooves on the inside where the plywood bottom can slide into. The grooves’ positioning depends on how shallow the box must be.
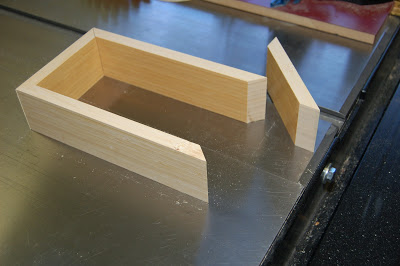
Step 4: It’s Coming Together—Assemble Your Parts
Now it’s time to see your creation come together!
Follow this advice step by step or one of your panels won’t fit:
- Put glue on miters and slots
- Place biscuits into slots
- Use these features to assemble three of the four sides
- Slide the bottom into place
- Add the fourth side
Now your construction must stay in place until the glue is dry. Push the panels together by tightly binding rope around the square. Plastic tubing is also an option.
Wait until it’s dry and sand it down to remove rough edges and leftover glue.
Step 5: Make the Lid User Friendly
Even with this simple jewellery box you have options to customize it and give it character. How do you want the box to close?
- Keep the lid separate from the base so you can put it aside while you rummage through its contents.
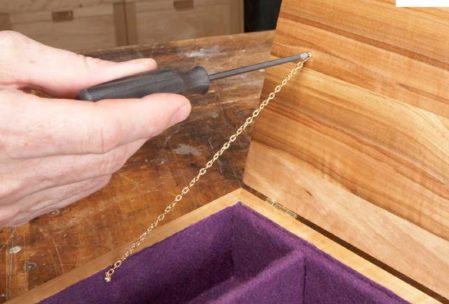
- Connect the lid to the base with hinges. In this case it’s ideal to add a chain on the inside too. It keeps the lid from wearing out the hinges or clamping down on your fingers while holding it:
o The hinges must allow the lid to lean backwards past vertical so it doesn’t snap shut
o The chain must be the right length to keep the lid from falling backwards completely
o Fix the chain to screws on the inside of box so it falls inside when the lid is closed
Step 6: Add the X Factor
You want your jewellery box to look as stylish as the jewels inside, right? That’s why the finishing touches are important.
Keep it Classic on the Outside
Wood has timeless aesthetic value. That’s why a wooden jewellery box is always a stylish gift. You can decorate it, but a simple wood finish is usually the best answer.
Test the finish on a leftover piece of wood to ensure it’s the shade you want. One layer is enough. The more coats you add the darker the wood will become. Add thin coats with a brush so they can dry easily.
Tip: If this box is meant as a present you need to plan ahead. Any stain or finish will give off some residue at first. Allow for enough time that the box can stand and dry completely before gifting it. You don’t want your friend’s hands stained, right?
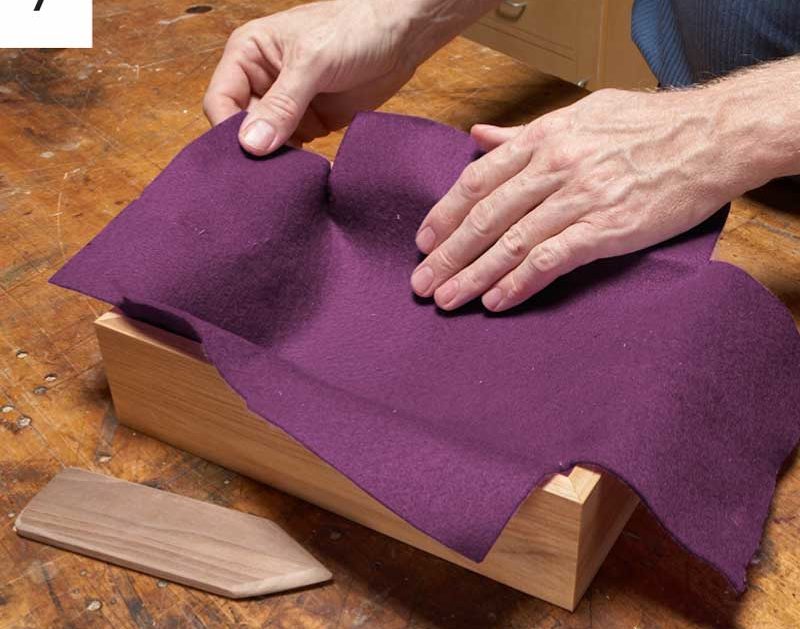
Add Flair to the Inside
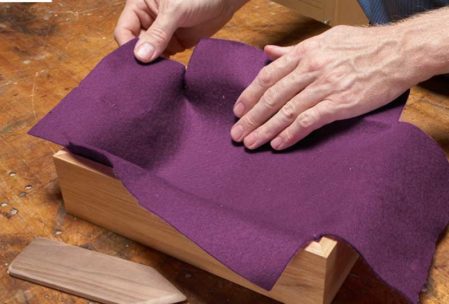
A felt interior is beautiful and practical because the pieces won’t easily roll around or get damaged.
Do it step by step and this won’t get messy:
- Place glue on the bottom first.
- Spread glue—very thinly—directly on the wood.
- Cut a piece of felt big enough to cover bottom and sides. Add notches so the felt will easily bend upwards.
- Place felt on the glue and press down hard. Smooth out all creases.
- Now spread glue on sides.
- Press felt onto sides.
- Cut away excess felt
Add another feature for even more diversity: Dividers.
Cut dividers to size out of plywood and cover them with felt. They can be the length or width of the box. Now they can slide into place and even be moved depending on the owner’s requirements.
Don’t Forget the Bottom
Show the owner of the jewellery box that you thought of everything. Glue small felt squares to the bottom. This prevents slipping and scratching of smooth surfaces.
Voila! You’ve done it. Following a step by step guide shows you what you’re capable of. Building wooden jewellery boxes is only the beginning. What other small woodworking projects will you attempt next?
Leave a Reply